

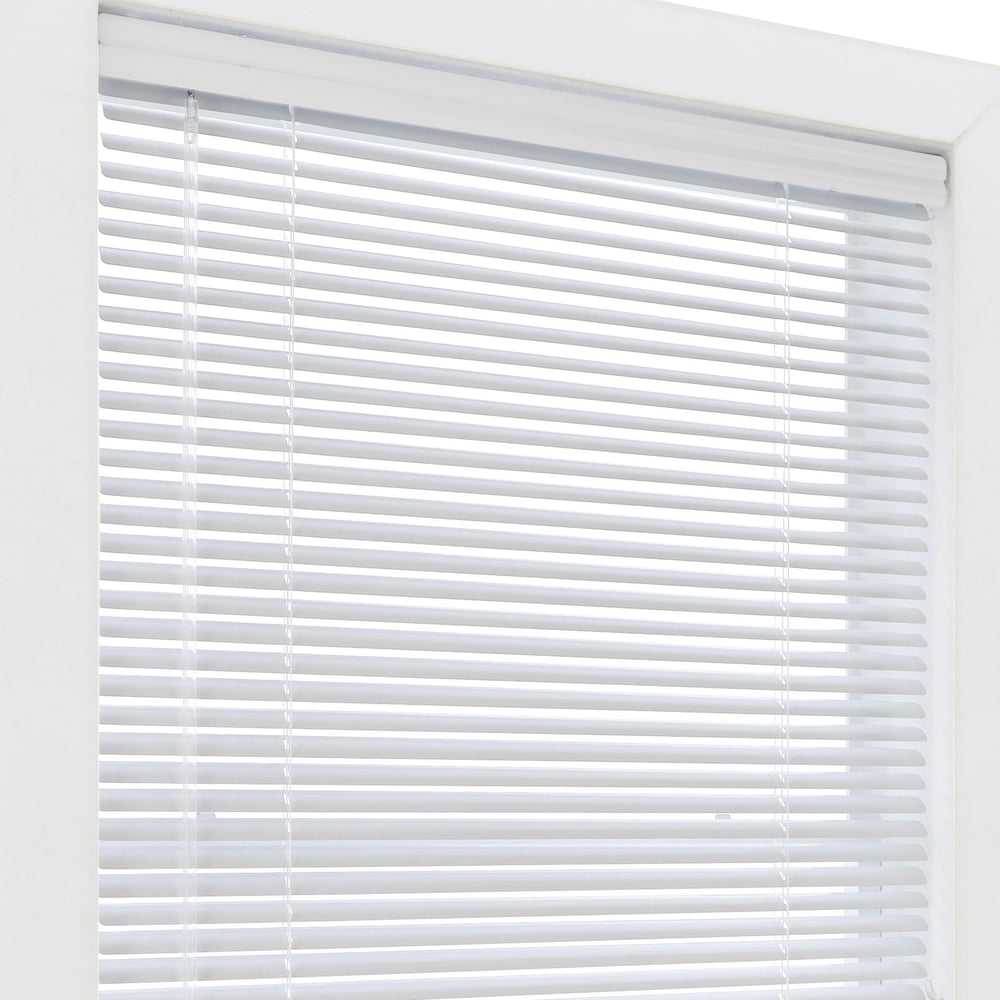


1 Inch Aluminum Blinds
SKU: BLN-1AB
Made to order, ships in 5–7 business days. Once shipped, delivery typically takes 5 business days, depending on your location.
This aluminum blind is one of our most budget-friendly blinds combining the classic mini blind look with a modern design. It is durable, easy to clean, and available in a wide array of colors. We recommend it for any high traffic area of the house, even doors!
- 6-Gauge Aluminum
- Chip & Fade Resistant
Color: Snow White
9 colors available
$ - Essential
Mount: Not selected
Size: 24" W × 36" H
Measurements to the nearest 1/8 inch.
Fit or Free Guarantee. If for any reason your window coverings don't fit, even if you make a mistake in measuring, we'll remake them in the size you need free of charge. More details about the Fit or Free Guarantee
Tilt: Not selected
Name your windowOptional
Installation help nearby
DIY Install is simple, but if you'd prefer help, enter your ZIP code to find available pros in your area.
- Fit or Free Guarantee
- Free Shipping
- 60-Day Satisfaction Guarantee
Product Information
This modern and affordable aluminum blind effortlessly reduces the amount of sunlight coming through your window as you control the resting position of the slats with a simple twist of the tilt wand. Behind the basic design of this classic window blind are high quality components inside and out that keep your blind looking and functioning great for years to come. Features a cordless lift mechanism that is safe and easy to use – just push in the button on the bottom rail, move the blind to the desired location, and release the button to hold it in place! Aluminum mini blinds have been a popular favorite for their durability, color variety and easy maintenance – everything you'll enjoy with your new 1" aluminum blind from Blindster.
Get to know this blind:
- 6-gauge aluminum slats are 1" wide in the classic mini-blind style
- Tilt wand is clear and all other components are color coordinated
- Includes an integrated valance, providing a clean, finished look
Why you'll love this blind:
- Blends into many decor styles making it easy to decorate with a wide range of appealing color selections
- Aluminum slats are spring-tempered to easily bounce back if bent an reduce dings and dents
- Dust resistant anti-static finish helps to keep slats cleaner for longer
- Innovative cordless lift system with push-button release and reliable operation
- Great for any room in the house, and its small depth requirement works great for shallow windows
- Complies with all current child safety requirements
Key considerations:
- Many colors also available in our 2" aluminum blinds
Great for:Living RoomBedroomOfficeKitchenDining RoomBathroomEntry WayUtility Room
- Easy to Clean
- Privacy
- Water Resistant
Made to order, ships in 5–7 business days. Once shipped, delivery typically takes 5 business days, depending on your location.
Key Features
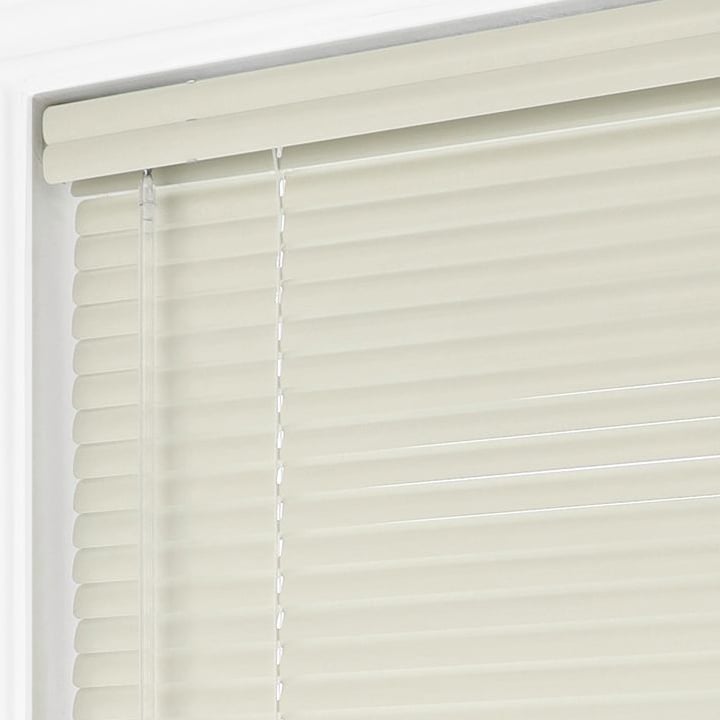
Headrail Size
A smaller headrail means the blind can fit in shallow windows

Color Coordination
Several color choices match our 2” Aluminum Blind.

Chip & Fade Resistant
In the final production phase, a baked-on enamel finish is applied to each slat.
Specifications & Restrictions
- Width
- 13 1/8" – 108"
- Height
- 12" – 96"
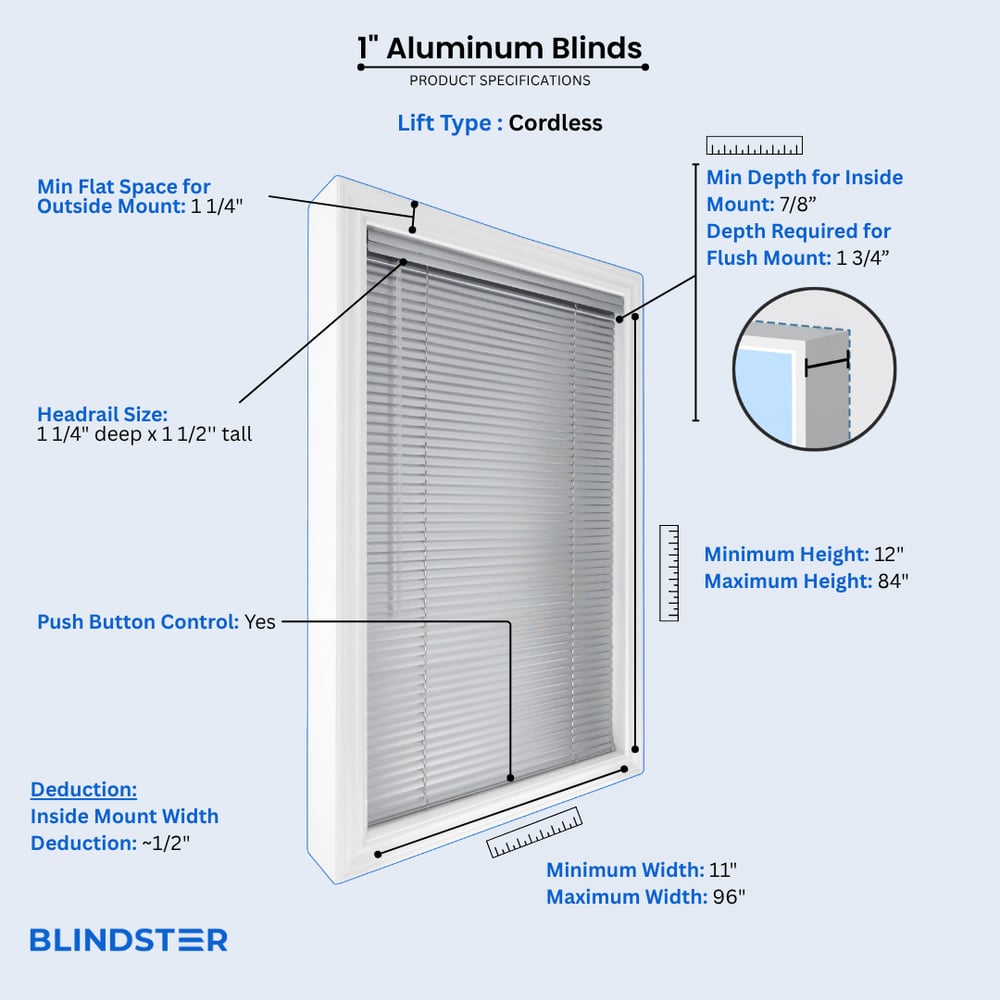
- Min depth for inside mount
7/8 inches
- Depth required for flush mount
1 ¾ inches
- Headrail size
1 ½ inch (high) x 1 ¼ inch (deep)
- Min Flat Space For Outside Mount
1 ¼ inch
- Inside Mount Width Deduction
Approximately ½ inch
Restrictions
- Wand tilt is the only tilt type
- Only available with Cordless Lift
How to Measure
How to Measure: Inside Mount
3 min read
Let's make sure an inside mount will work for your window! Using a metal tape measure, first check if you have sufficient depth:
- Measure inside the window opening from the back of the window to the front of the opening where the blind would mount. The depth at the top of the window must be at least 7/8" to mount the brackets. To have a flush mount (meaning the blind is fully recessed in the window opening) the depth must be at least 1 3/4". If your depth is not sufficient for mounting the brackets, please see our outside mount instructions or consider a different product.
How to Measure:
Let's start with the Width:
- Measure inside of the window opening/frame from left to right to the nearest 1/8" at three places: at the top of the opening, the middle of the opening, and then the bottom of the opening. Write down all 3 measurements and circle the narrowest. If rounding is necessary, round down to the nearest 1/8". That is your ordering width.
Now, let's do the Height:
- Measure the inside of the window opening/frame from the top of the opening to the bottom of the opening/sill to the nearest 1/8" in three places: on the left-hand side, the middle, and on the right-hand side. Write down all 3 measurements and circle the tallest. That is your ordering height.
Note: Always provide us with the actual measurement of the window opening. We will make the necessary deduction of approximately 1/2" to your blind's width to allow room for installation and for proper movement of the blind within the window opening. No deductions will be made to your height.
How to Measure: Outside Mount
3 min read
Before you start measuring, decide where above your window opening you want to mount your blind. You will need at least 1 ¼" of flat vertical space above the window to mount the brackets. The blind can be installed directly above the window opening, or higher up to give the appearance of a larger window and to have more clear space in the window when the blind is raised.
If you have trim around the window, you can mount the blind above the trim, directly on the trim (if you have the required minimum flat space for the brackets), or to the sides of the trim if you do not enough mounting space above the window or on the trim itself. See the directions below for how you'd like to install your blind.
If you do not have sufficient vertical space for mounting the brackets, please see our inside mount instructions or consider a different product.
Width:
- Looking at your window and surrounding wall, decide what area you would like to cover. We recommend the blind extends about 2" on each side of the window opening for the best light control and appearance.
- Using a metal tape measure, measure from left to right including your desired extra space on each side of the window—that is your ordering width.
Height:
- Consider how far above the window you would like to install your blind but at least starting with the minimum vertical space referenced above. The blind can be positioned higher up to give the appearance of a larger window and to have more clear space in the window when the blind is raised.
- Measure from the top of where you will mount the blind on the wall down to where you want the bottom of the blind to be, using the same extra space below your window opening as you used above; if you have a protruding windowsill, measure down to the top of the sill. That is your ordering height.
Width:
- Looking at your window and surrounding wall, decide what area you would like to cover. We recommend the blind extends about 2" on either side of the window opening for the best light control and appearance. You can also choose to have the blind the same width as your window trim.
- Using a metal tape measure, measure from left to right including any desired extra space on each side of the window—that is your ordering width.
Height:
- Consider how far above the window you would like to install your blind but at least starting with the minimum vertical space referenced above. The blind can be positioned higher up to give the appearance of a larger window and to have more clear space in the window when the blind is raised.
- Measure from the top of where you will mount the blind on the wall down to where you want the bottom of the blind to be, using the same extra space below your window opening as you used above, or to the bottom edge of the trim if you prefer; if you have a protruding windowsill, measure down to the top of the sill. That is your ordering height.
Note: We provide complimentary spacer blocks upon request. These go behind the installation brackets to position the blind away from the wall and prevent the blind from hitting the frame. Spacer blocks add an additional 3/8" of depth for installation.
Width:
- Confirm that the height of your trim is at least the minimum height required for installing the mounting brackets. At the top of your window, use a steel measuring tape and measure from outer edge to outer edge of the trim. That is your ordering width.
Height:
- Measure from the top of your trim to the bottom of your trim or to the top of the windowsill if you have a protruding sill. That is your ordering height.
Width:
- Using a metal tape measure, measure left to right from the outside edge of the trim piece that goes around the glass to the other outside edge. That is your ordering width. However, if you have space, it is best to order the blind about 2" wider for better light control.
Height:
- Consider how far above the window trim piece you would like to install your blind but at least starting with the minimum vertical space referenced above. Measure down to where you want the bottom of the blind to be, using the same extra space below the window trim piece as you used above. That is your ordering height.
How to Install
How to Install: Inside Mount
2 min read
Let's make sure you have what you need!
What came with your blinds?
- Mounting brackets*
- 1 ¼" mounting bracket screws (two per bracket)
- One valance
- Valance clips*
- One tilt wand
What else will you need in order to complete the installation?
- Rechargeable drill with ¼" hex bit
- Phillips screwdriver
- Pencil
- Tape measure
- Ladder
*Quantity will vary depending on width. Regarding mounting brackets and valance clips- if your window is up to 40" wide you will have two mounting brackets and two valance clips. If your window is 40 1/8"-54" wide you will have three mounting brackets and three valance clips. If your window is 54 1/8"-72" wide you will have four mounting brackets and four valance clips.
Download the PDF below for a complete step by step guide on how to install your inside mount blinds.
How to Install: Outside Mount
4 min read
Let's make sure you have what you need!
What came with your blinds?
- Mounting brackets*
- 1 ¼" mounting bracket screws (two per bracket)
- One valance
- Valance clips*
- One tilt wand
- One spacer block per bracket**
What else will you need in order to complete the installation?
- Rechargeable drill with ¼" hex bit
- Phillips screwdriver
- Pencil
- Tape measure
- Ladder
*Quantity will vary depending on width. Regarding mounting brackets and valance clips- if your window is up to 40" wide you will have two mounting brackets and two valance clips. If your window is 40 1/8"-54" wide you will have three mounting brackets and three valance clips. If your window is 54 1/8"-72" wide you will have four mounting brackets and four valance clips.
**If applicable to your order.
Download the PDF below for a complete step by step guide on how to install your outside mount blinds.
Videos
Aluminum Blinds - The Cost Effective Solution
How to Measure for Inside Mount Blinds
How to Measure for Outside Mount Blinds
How to Install Aluminum Blinds
How They're Made - Aluminum Blinds
Reviews
4.7
Based on 1,395 reviews
Brian
The blind was really well packaged. The blind matched the expected color. I really like the button to raise and lower. It looks great in the window.
Dennis
Perfect fit and finish
Leonard
All I can say is WOW.I love them.Great blinds.Thank you
Paul
Fast delivery. Perfect fit. Easy to install. Would do it again.
James
The ordering experience was easy and the delivery went very smooth. The blinds themselves seem to be higher quality than the ones we were replacing and that's always a good thing!
Gail
Looks great and easy to install.
Cathy
perfect colour
Pat
Perfect fit and function.
Joan
I got exactly what I wanted & in a reasonable wait time.
Gabrielle
got a few samples, measured and got them ordered with a great discount, then installed and they look great! been getting teriffic compliments ever since. the up and down button is super easy to use.