


2 Inch Cordless Faux Wood Blinds
SKU: BLN2SVCFWB117
Made to order, ships in 1–3 business days. Once shipped, delivery typically takes 5 business days, depending on your location.
Sometimes all you really need is the essentials! Our Cordless faux wood blind checks all the boxes for reliable privacy and light control – easy operation, simple design and a great price! Get the Essentials from Blindster!
Color: Bright White
1 colors available
$ - Essential
Mount: Not selected
Size: 24" W × 36" H
Measurements to the nearest 1/8 inch.
Fit or Free Guarantee. If for any reason your window coverings don't fit, even if you make a mistake in measuring, we'll remake them in the size you need free of charge. More details about the Fit or Free Guarantee
Lift Type: Not selected
Valance Style: Not selected
Spacer Blocks: Not selected
Name your windowOptional
Installation help nearby
DIY Install is simple, but if you'd prefer help, enter your ZIP code to find available pros in your area.
- Fit or Free Guarantee
- Free Shipping
- 60-Day Satisfaction Guarantee
Product Information
When you’re just looking for the essentials, Blindster has you covered. Our 2” Cordless Faux Wood Blind has the look, the style and the price that give you everything you need in a faux wood blind. Why pay more when you just need the basics? Our Cordless Blind is child safe with no external pull cords – just push up or pull down the bottom of the blind to raise and lower. A wand tilter is included to easily rotate the slats opened and closed for privacy and light control. Since they are made from a wood-alternative material, these blinds are moisture resistant, preventing cracking and peeling. All you need is your window size and to decide on either the smooth or textured white color option. It’s that easy!
Get to know this blind:
- Budget-friendly faux wood blind available in smooth white
- Operates with cordless lift to raise and lower, and wand tilt to rotate the slats
- Decorative valance and installation hardware included
Why you'll love this blind:
- Available in our most popular color option – traditional smooth white
- Provides excellent light and privacy control with easy operation
- Tilt wand and cordless lift control provide a modern, uncluttered look and are child safe
- Durable, moisture-resistant material won't warp, crack or peel from humidity
- Stylish valance is included standard to hide the brackets and headrail, and to provide a decorative finish
- Meets all CPSC requirements for child safety
Key considerations:
- Wand tilter is positioned on the left side only
- Wands will be 21" long for blinds 27" wide or less and 25" long for blinds wider than 27"
- Blinds may have up to 3 extra slats at the bottom
- Water Resistant
- Easy to Clean
- Child & Pet Safety
Made to order, ships in 1–3 business days. Once shipped, delivery typically takes 5 business days, depending on your location.
Key Features
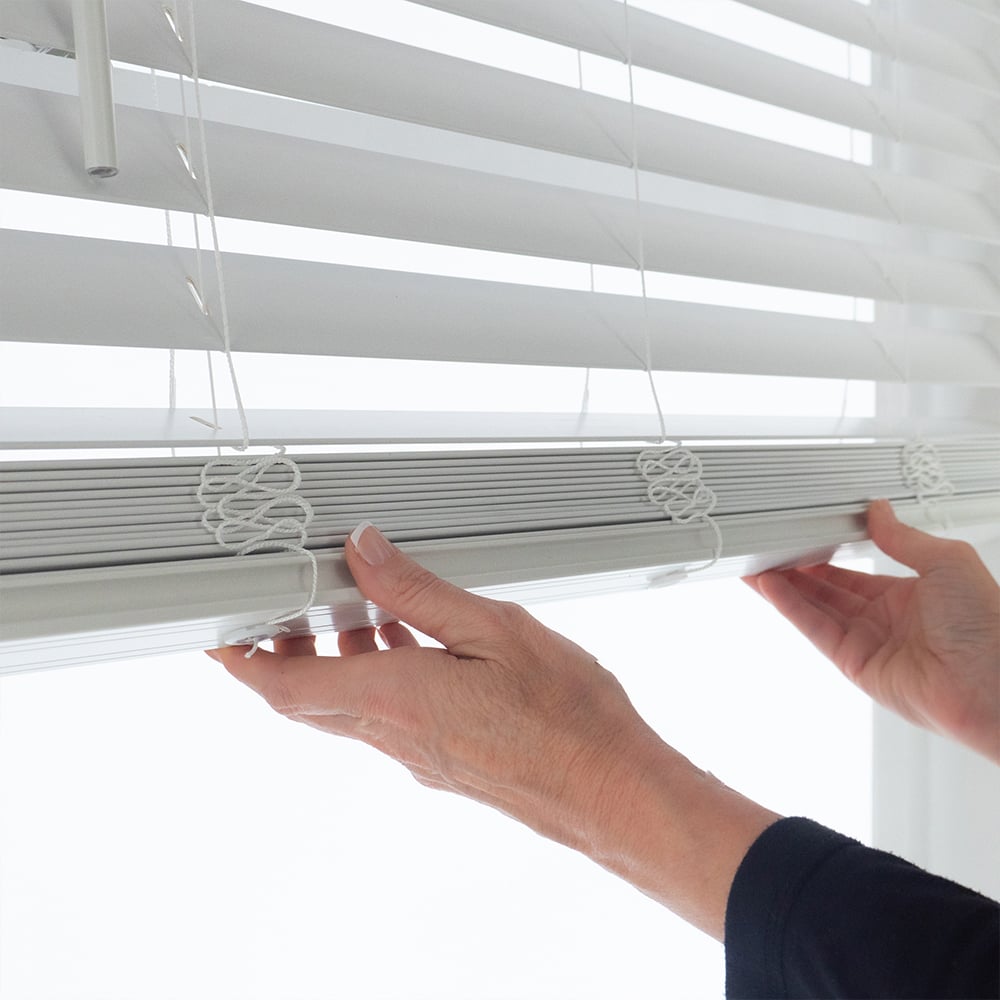
Cordless Lift
The easiest (and safest) way to control your blind. With no unsightly cords or buttons, simply grab the bottom rail with your hand to lift and lower.
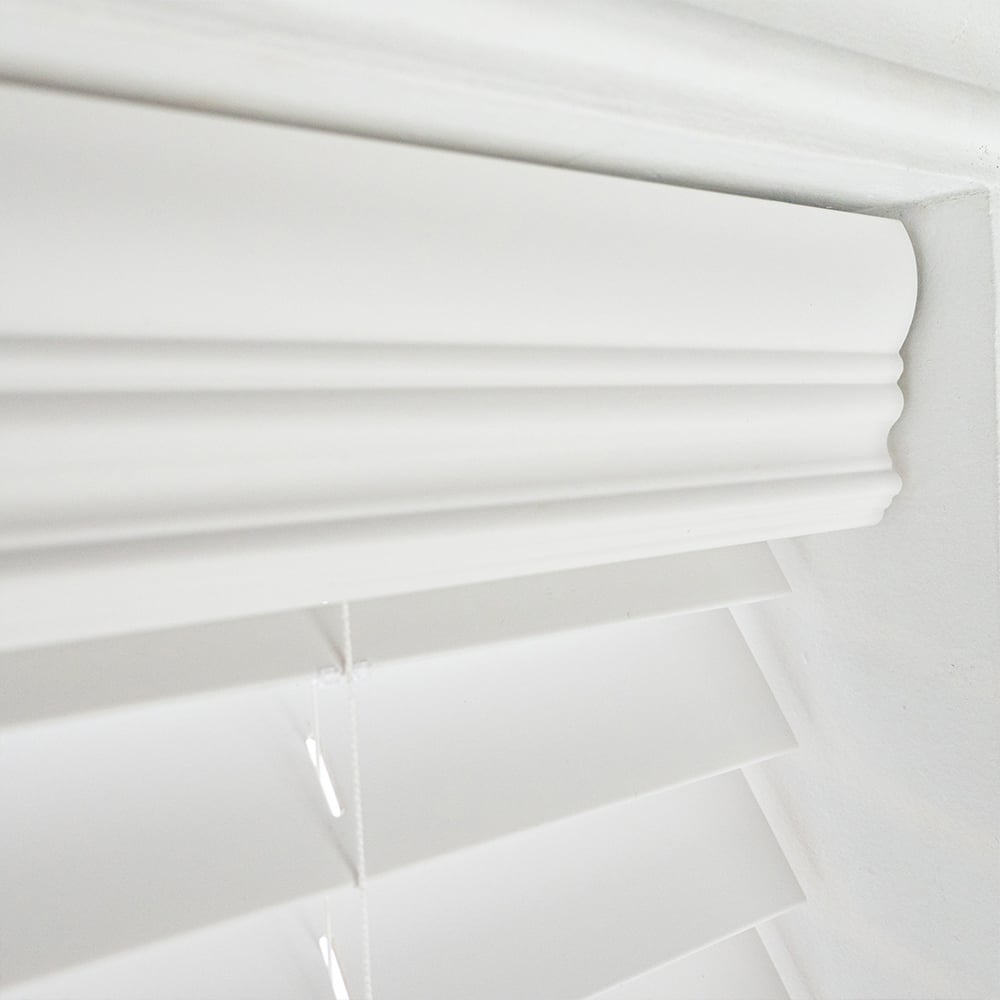
Decorative Valance
Stylish crown-style valance is included standard to hide the brackets and headrail, and to provide a decorative finish.
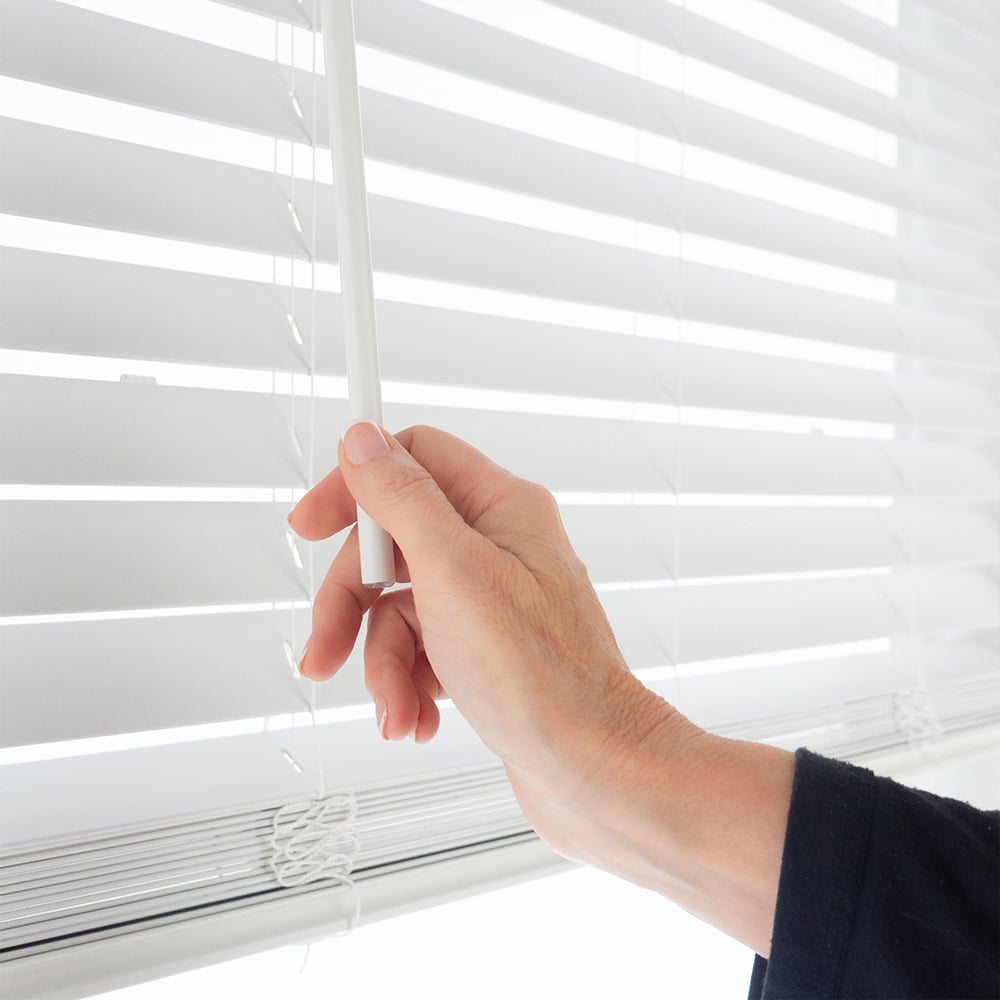
Wand Tilt
Convenient wand tilt to smoothly and easily rotate the slats

Best for Kids™ Certified
The Best for Kids™ certification designates window covering products that are best suited for use in homes with young children.
Specifications & Restrictions
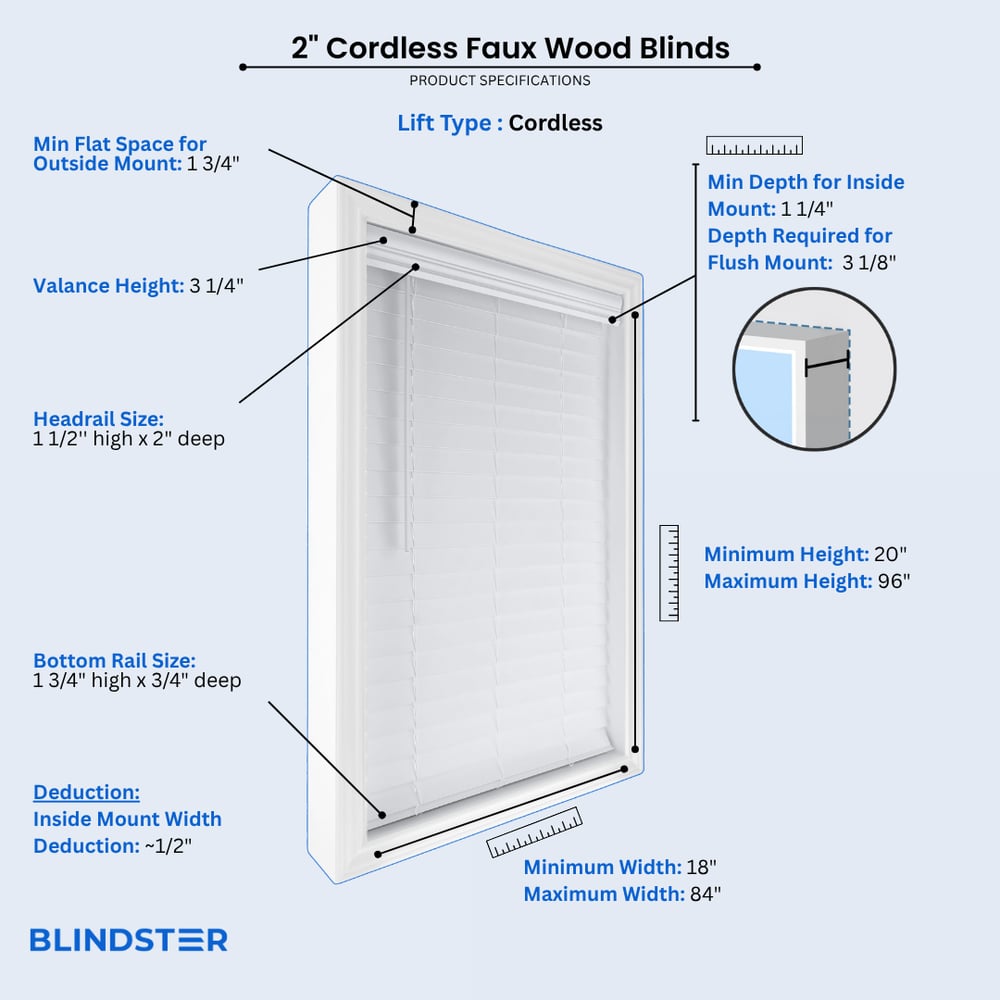
- Width
- 18" – 84"
- Height
- 20" – 96"
- Min depth for inside mount
1 ¼ inches
- Depth required for flush mount
3 1/8 inches
- Min Flat Space for outside mount
1 ¾ inches
- Headrail size
1 ½" high x 2" deep
- Valance Height
3 ¼ inches
- Outside mount valance returns (side pieces)
3 1/8 Inches
- Inside Mount Width Deduction (Headrail and Blind)
approximately ½ inch
- Bottom Rail Dimension
5/8 inch high x 2 inches depth
Restrictions
- Wands will be 21" long for blinds 27" wide or less and 25" long for blinds wider than 27".
- All Blinds will arrive with a center support bracket, for maximum blind support.
How to Measure
How to Measure: Inside Mount
3 min read
Let's make sure an inside mount will work for your window! Using a metal tape measure, first check if you have sufficient depth:
- Measure inside the window opening from the back of the window to the front of the opening where the blind would mount. The depth at the top of the window must be at least 1 1/4" to mount the brackets. To have a flush mount (meaning the blind is fully recessed in the window opening) the depth must be at least 3 1/8". If your depth is not sufficient for mounting the brackets, please see our outside mount instructions or consider a different product.
How to Measure:
Let's start with the Width:
- Measure inside of the window opening/frame from left to right to the nearest 1/8" at three places: at the top of the opening, the middle of the opening, and then the bottom of the opening. Write down all 3 measurements and circle the narrowest. If rounding is necessary, round down to the nearest 1/8". That is your ordering width.
Now, let's do the Height:
- Measure the inside of the window opening/frame from the top of the opening to the bottom of the opening/sill to the nearest 1/8" in three places: on the left-hand side, the middle, and on the right-hand side. Write down all 3 measurements and circle the tallest. That is your ordering height.
Note: Always provide us with the actual measurement of the window opening. We will make the necessary deduction of approximately 1/2" to your blind's width to allow room for installation and for proper movement of the blind within the window opening. No deductions will be made to your height.
How to Measure: Outside Mount
3 min read
Before you start measuring, decide where above your window opening you want to mount your blind. You will need at least 1 3/4" of flat vertical space above the window to mount the brackets. The blind can be installed directly above the window opening, or higher up to give the appearance of a larger window and to have more clear space in the window when the blind is raised.
If you have trim around the window, you can mount the blind above the trim, directly on the trim (if you have the required minimum flat space for the brackets), or to the sides of the trim if you do not enough mounting space above the window or on the trim itself. See the directions below for how you'd like to install your blind.
If you do not have sufficient vertical space for mounting the brackets, please see our inside mount instructions or consider a different product.
Width:
- Looking at your window and surrounding wall, decide what area you would like to cover. We recommend the blind extends about 2" on each side of the window opening for the best light control and appearance.
- Using a metal tape measure, measure from left to right including your desired extra space on each side of the window—that is your ordering width.
Height:
- Consider how far above the window you would like to install your blind but at least starting with the minimum vertical space referenced above. The blind can be positioned higher up to give the appearance of a larger window and to have more clear space in the window when the blind is raised.
- Measure from the top of where you will mount the blind on the wall down to where you want the bottom of the blind to be, using the same extra space below your window opening as you used above; if you have a protruding windowsill, measure down to the top of the sill. That is your ordering height.
Width:
- Looking at your window and surrounding wall, decide what area you would like to cover. We recommend the blind extends about 2" on either side of the window opening for the best light control and appearance. You can also choose to have the blind the same width as your window trim.
- Using a metal tape measure, measure from left to right including any desired extra space on each side of the window—that is your ordering width.
Height:
- Consider how far above the window you would like to install your blind but at least starting with the minimum vertical space referenced above. The blind can be positioned higher up to give the appearance of a larger window and to have more clear space in the window when the blind is raised.
- Measure from the top of where you will mount the blind on the wall down to where you want the bottom of the blind to be, using the same extra space below your window opening as you used above, or to the bottom edge of the trim if you prefer; if you have a protruding windowsill, measure down to the top of the sill. That is your ordering height.
Note: We provide complimentary spacer blocks upon request. These go behind the installation brackets to position the blind away from the wall and prevent the blind from hitting the frame. Spacer blocks add an additional 3/8" of depth for installation.
Width:
- Confirm that the height of your trim is at least the minimum height required for installing the mounting brackets. At the top of your window, use a steel measuring tape and measure from outer edge to outer edge of the trim. We advise that you take this measurement and make it 1/4” smaller so that the brackets can mount right on the trim. That is your ordering width.
Height:
- Measure from the top of your trim to the bottom of your trim or to the top of the windowsill if you have a protruding sill. That is your ordering height.
Width:
- Using a metal tape measure, measure left to right from the outside edge of the trim piece that goes around the glass to the other outside edge. That is your ordering width. However, if you have space, it is best to order the blind about 2" wider for better light control.
Height:
- Consider how far above the window trim piece you would like to install your blind but at least starting with the minimum vertical space referenced above. Measure down to where you want the bottom of the blind to be, using the same extra space below the window trim piece as you used above. That is your ordering height.
How to Install
How to Install: Inside Mount
2 min read
Let's make sure you have what you need!
What came with your blinds?
- Left and right box-style mounting brackets
- Four mounting bracket screws (two per bracket)
- One valance
- Center support bracket with support screws
- One tilt wand
What else will you need in order to complete the installation?
- Rechargeable drill with ¼" hex bit
- Phillips screwdriver
- Pencil
- Tape measure
- Ladder
Download the PDF below for a complete step by step guide on how to install your inside mount blinds.
How to Install: Outside Mount
4 min read
Let's make sure you have what you need!
What came with your blinds?
- Left and right box-style mounting brackets
- Four mounting bracket screws (two per bracket)
- One valance with two side pieces
- Center support bracket with support screws
- One tilt wand
- Two hold down brackets
- 5/8" hold down screws (two per hold down bracket)
What else will you need in order to complete the installation?
- Rechargeable drill with ¼" hex bit
- Phillips screwdriver
- Pencil
- Tape measure
- Ladder
Download the PDF below for a complete step by step guide on how to install your outside mount blinds.
Read More About This Product
Everyday Performance of 2 Inch Cordless Faux Wood Blinds
2-Inch Cordless Faux Wood Blinds are designed for dependable daily use across a wide range of windows. These faux wood blinds combine the classic appearance of wood blinds with the added benefits of moisture resistance and low maintenance. The cordless faux wood blinds design includes a smooth cordless feature that allows the blind to raise and lower easily using a built-in lift, improving both safety and overall functionality.
Constructed from durable faux wood, these blinds hold up well over time, offering strong durability, consistent quality, and a stable bottom rail that helps maintain alignment. The result is a perfect fit that looks clean and performs reliably in everyday conditions.
Where Cordless Faux Wood Blinds Work Best
Thanks to their versatility, cordless faux wood blinds are a practical choice for nearly every room in the house. They work especially well in high-use areas like the dining room, shared living spaces, and bathrooms, where moisture resistance is important. When used on a door, the cordless faux design reduces movement and improves stability compared to traditional blinds.
These cordless faux blinds provide balanced light control while maintaining privacy, making them a smart solution for both small and large openings. Their adaptable design allows them to fit a variety of window sizes while maintaining consistent performance across different spaces.
Clean Design, Style, and Visual Appeal
With their simple profile and smooth finish, these are nice blinds that blend easily into many interiors. The combination of a valance, sturdy rail, and wide slats creates a clean and sleek appearance that feels modern without being overpowering. Whether you prefer a subtle or more elegant look, these blinds offer a refined balance of form and function.
Available in classic white, the design allows homeowners to choose a style that complements existing decor. The result is beautiful blinds with an elegant finish that enhances the overall style of a space while still offering great value.
Ordering, Installation, and What to Expect
Placing an order for these blinds is straightforward, with clear sizing guidance to help ensure proper installation. The installation process is designed to be easy, allowing customers to complete setup with minimal tools and effort. Clear instructions help create a smooth experience from start to finish, reducing guesswork and saving time.
When considering price, these blinds deliver strong performance without unnecessary extras. Many customers appreciate the balance of affordability and reliability, often leaving a positive review after installation. From purchase to delivery, expectations are clearly outlined so you know what is expected, whether ordering standard options or going with customized features.
FAQ
What makes faux wood blinds a good everyday choice compared to wood blinds?
Faux wood blinds offer the classic look of wood blinds with added durability and lower maintenance. Made from resilient faux wood, these blinds resist moisture, cracking, and warping from humidity, which helps maintain long term quality. Many homeowners choose cordless faux wood blinds because they combine good quality, reliable functionality, and great value for everyday use throughout the house.
Do cordless faux wood blinds work well on doors and in different rooms?
Yes. Cordless faux wood blinds are a practical solution for nearly any room, including spaces with a frequently used door or areas like bathrooms where humidity is present. The cordless faux design improves ease of use and safety, especially for homes with pets. With a sturdy bottom rail, supportive rail structure, and valance, these blinds are designed to deliver a perfect fit and a sleek appearance across different spaces.
How easy is it to install and customize faux wood blinds?
The install process is designed to be easy and super easy to follow with clear steps that help you choose the right options and create a clean finished look. Proper measurements ensure the blinds fit correctly, improving both appearance and performance. Customers often mention in a review that the price reflects the overall value, especially when ordering a white finish or selecting a preferred color option. A quick note during checkout helps set expectations so customers know what to expect before installation.
How do faux wood blinds compare to wood blinds in terms of quality and durability?
Good quality faux wood blinds are designed to deliver consistent quality and long-term durability while maintaining the appearance of traditional wood blinds. Made from durable faux wood, these blinds resist moisture, cracking, and warping from humidity, making them a great option for everyday use. Many homeowners choose cordless faux wood blinds because they provide good performance and dependable results at a more accessible price point.
Are cordless faux wood blinds suitable for doors and homes with pets?
Yes. Cordless faux wood and cordless faux blind designs work especially well on a door, where stability and ease of use matter most. Without dangling cords, these blinds are safer for homes with pets and easier to operate day to day. With proper sizing, the blinds fit securely, helping maintain smooth operation and long-lasting performance throughout the home.
What customization options are available for faux wood blinds?
These faux wood blinds are available in classic white and additional color options to match different spaces and decor styles. A matching valance provides a finished look at the top of the blind, while the clean materials help maintain a polished appearance over time. Many customers mention in a review that the ordering process is simple and that the overall ease of customization meets expectations.
Videos
Faux Wood Blinds - Craft Your Perfect Space
Cordless Blinds and Shades
How to Measure for Inside Mount Blinds
How to Measure for Outside Mount Blinds
How to Install Wood and Faux Wood Blinds
How They're Made - Faux Wood and Wood Blinds
Reviews
4.8
Based on 75 reviews
Jane
Having an Industrial Arts degree these were very easy to put up. For those who do not have a talent, they would benefit from a set of instructions.
Lawrence
Exactly what I was looking for. Delivered quickly. Easy to Install. Very pleased with Results. Process was very smooth and short. Would not hesitate to recommend or use again
Thomas
They arrived in a timely manner as usual, fit well and look great.
Jackie
The blinds are very good quality and I look forward to purchasing more.
Glenn
The blinds look nice and complement the room. They arrived without installation instructions, although I found them on line. Installation was simple expect it was difficult to attach the valances.
Eunice
Quick shipment, quality drapes, great pricing.
Dayna
I love these blinds so much. I can now have more privacy than before. Before I had the one big blind that went from one window to the other and it was so annoying when you have an air conditioner in the other window. The privacy was gone. Now with these Cordless Faux Wood Blinds I have my privacy back. I can block off one window and pull down the other until it reaches the window a/c. I definitely recommend them.
Paul
The blinds look great and were easy to install.
Elaine
Beautiful
Susan
Came in with no issues and in today’s world that’s saying a lot.