
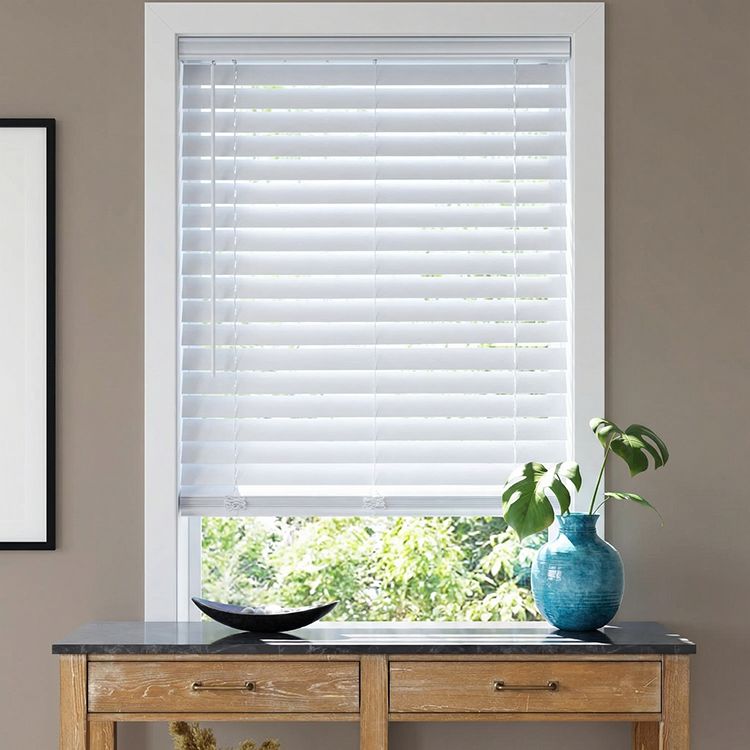


2 Inch Cordless Vinyl Faux Wood Blinds
SKU: BLN-2CVFWB
Made to order, ships in 2–4 business days. Once shipped, delivery typically takes 5 business days, depending on your location.
A Blindster exclusive, our 2" cordless vinyl faux wood blinds feature a unique beveled edge slat design for tighter closure and more light blocking than typical faux wood blinds. The blind is incredibly lightweight making it easy to operate with the included cordless lift-style operation.
- Budget-Friendly!
- Blindster Exclusive
- No Lift Cords
Color: White
1 colors available
$ - Essential
Mount: Not selected
Size: 24" W × 36" H
Measurements to the nearest 1/8 inch.
Fit or Free Guarantee. If for any reason your window coverings don't fit, even if you make a mistake in measuring, we'll remake them in the size you need free of charge. More details about the Fit or Free Guarantee
Lift Type: Not selected
Name your windowOptional
Installation help nearby
DIY Install is simple, but if you'd prefer help, enter your ZIP code to find available pros in your area.
- Fit or Free Guarantee
- Free Shipping
- 60-Day Satisfaction Guarantee
Product Information
If you're looking for something a little different, our exclusive 2 Inch Cordless Vinyl Faux Wood blind delivers a distinctive look with better closure and light blocking than traditional faux wood blinds. Thanks to their less-bulky, beveled-edge design, each slat closes more tightly to the next which limits the amount of indirect light that can find its way into the room. Plus this blind operates without any dangling cords – the cordless lift feature that lets you raise or lower the blind with ease, or rotate them open and closed with the tilt wand. This child safe design looks great too, with no messy cords and an eye-catching profile. And no worries about installing these blinds in bathrooms or kitchens – the moisture resistant slats prevent damage from humidity and are easy to clean.
Get to know this blind:
- Distinctive slat design features a beveled edge on the front and back of the slat
- Cordless lift and wand tilt function for safe and convenient operation
- Contoured headrail for a finished look without the need for a separate valance
Why you'll love this blind:
- Ultra-light vinyl slats have a beveled edge for a distinctive look that allows slats to close more tightly and block more light
- Contemporary slat shape puts a new spin on a classic design
- Raise and lower the shade by gently pushing or pulling on the bottom rail – cord-free design provides an uncluttered look and safe operation
- Install anywhere in your home, even bathrooms or kitchens – they are moisture resistant and easy to clean
- Certified Best for Kids™ with no dangling cords for safe use in homes with young children
Key considerations:
- Depending on your blind height, wand will be either 24" or 29" long
Great for:Living RoomBedroomOfficeKitchenDining RoomBathroomEntry WayUtility Room
- Water Resistant
- Child & Pet Safety
- Easy to Clean
Made to order, ships in 2–4 business days. Once shipped, delivery typically takes 5 business days, depending on your location.
Key Features
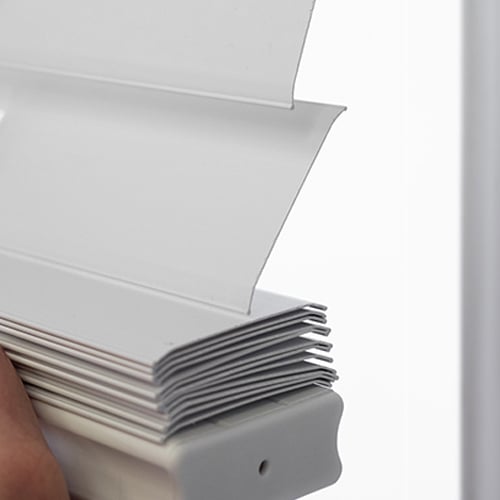
Beveled Edge Design
Vinyl slats feature a beveled edge design that closes tighter and increases rigidity.
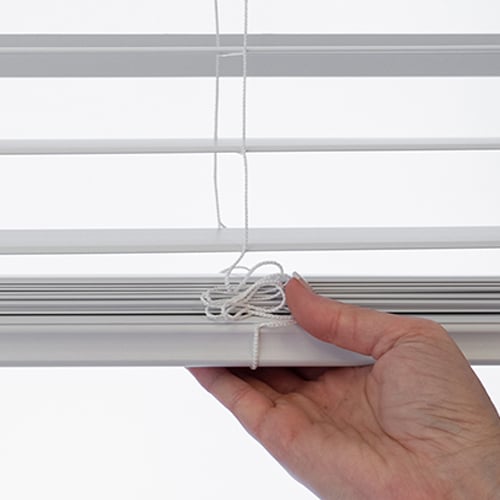
Cordless Lift
The easiest (and safest) way to control your blind. With no unsightly cords or buttons, simply grab the bottom-rail width your hand to lift and lower.

Fade and Warp Resistant
Faux wood slats treated with UV inhibitors to help protect from sun-induced fading and warping

Best for Kids™ Certified
The Best for Kids™ certification designates window covering products that are best suited for use in homes with young children.
Specifications & Restrictions
- Width
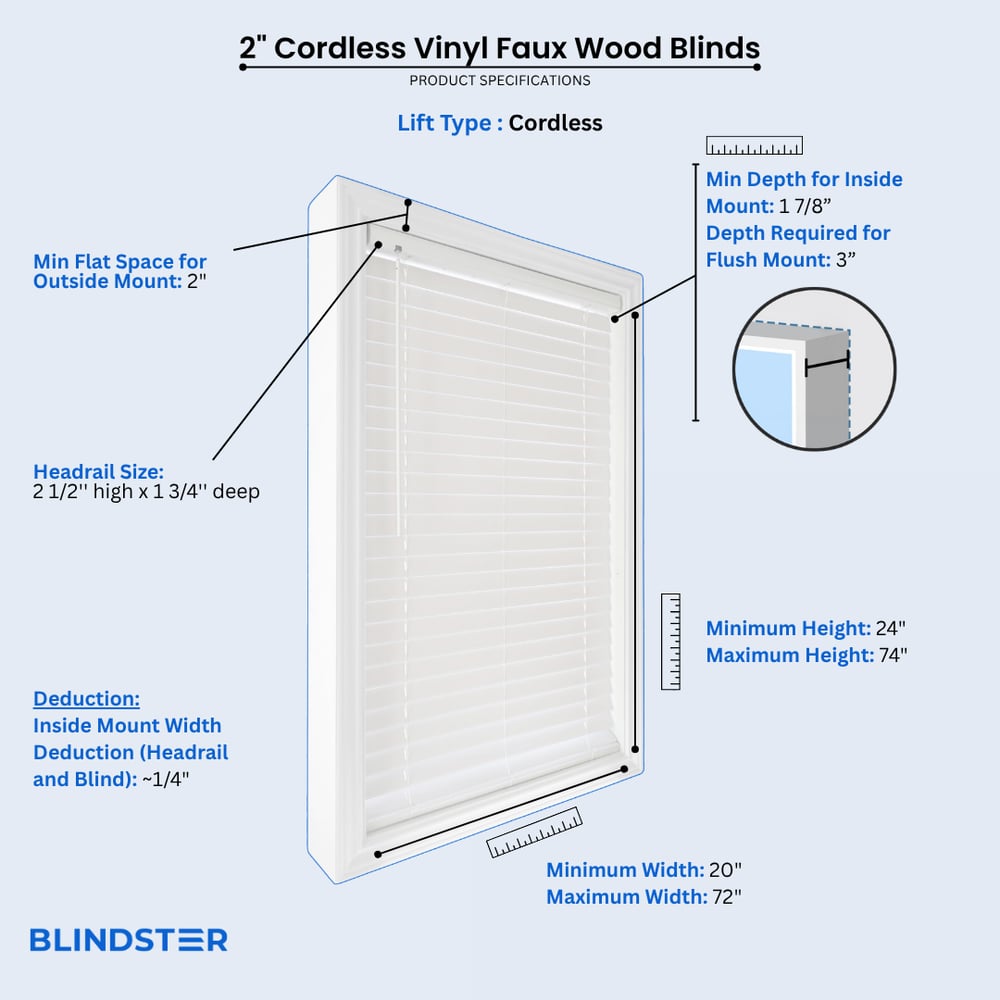
- 20" – 72"
- Height
- 24" – 74"
- Min depth for inside mount
1 7/8 inches
- Depth required for flush mount
3 inches
- Headrail size
2 ½ inches (high) x 1 ¾ inches (deep)
- Min Flat Space For Outside Mount
2 inches
- Inside Mount Width Deduction (Headrail and Blind)
Approximately ¼ inch
- Bottom Rail Dimension
¾ inch (high) x 2 inches (deep)
Restrictions
- Tilt type and position only available as White Wand on the left hand side
- Wand sizes come in either 24" or 29" length, depending on blind's height.
- Blinds ordered as Inside Mount cannot be side-mounted.
How to Measure
How to Measure: Inside Mount
3 min read
Let's make sure an inside mount will work for your window! Using a metal tape measure, first check if you have sufficient depth:
- Measure inside the window opening from the back of the window to the front of the opening where the blind would mount. The depth at the top of the window must be at least 1 7/8" to mount the brackets. To have a flush mount (meaning the blind is fully recessed in the window opening) the depth must be at least 3". If your depth is not sufficient for mounting the brackets, please see our outside mount instructions or consider a different product.
How to Measure:
Let's start with the Width:
- Measure inside of the window opening/frame from left to right to the nearest 1/8" at three places: at the top of the opening, the middle of the opening, and then the bottom of the opening. Write down all 3 measurements and circle the narrowest. If rounding is necessary, round down to the nearest 1/8". That is your ordering width.
Now, let's do the Height:
- Measure the inside of the window opening/frame from the top of the opening to the bottom of the opening/sill to the nearest 1/8" in three places: on the left-hand side, the middle, and on the right-hand side. Write down all 3 measurements and circle the tallest. That is your ordering height.
Note: Always provide us with the actual measurement of the window opening. We will make the necessary deduction of approximately 1/4" to your blind's width to allow room for installation and for proper movement of the blind within the window opening. No deductions will be made to your height.
How to Measure: Outside Mount
3 min read
Before you start measuring, decide where above your window opening you want to mount your blind. You will need at least 2" of flat vertical space above the window to mount the brackets. The blind can be installed directly above the window opening, or higher up to give the appearance of a larger window and to have more clear space in the window when the blind is raised.
If you have trim around the window, you can mount the blind above the trim, directly on the trim (if you have the required minimum flat space for the brackets), or to the sides of the trim if you do not enough mounting space above the window or on the trim itself. See the directions below for how you'd like to install your blind.
If you do not have sufficient vertical space for mounting the brackets, please see our inside mount instructions or consider a different product.
Width:
- Looking at your window and surrounding wall, decide what area you would like to cover. We recommend the blind extends about 2" on each side of the window opening for the best light control and appearance.
- Using a metal tape measure, measure from left to right including your desired extra space on each side of the window—that is your ordering width.
Height:
- Consider how far above the window you would like to install your blind but at least starting with the minimum vertical space referenced above. The blind can be positioned higher up to give the appearance of a larger window and to have more clear space in the window when the blind is raised.
- Measure from the top of where you will mount the blind on the wall down to where you want the bottom of the blind to be, using the same extra space below your window opening as you used above; if you have a protruding windowsill, measure down to the top of the sill. That is your ordering height.
Width:
- Looking at your window and surrounding wall, decide what area you would like to cover. We recommend the blind extends about 2" on either side of the window opening for the best light control and appearance. You can also choose to have the blind the same width as your window trim.
- Using a metal tape measure, measure from left to right including any desired extra space on each side of the window—that is your ordering width.
Height:
- Consider how far above the window you would like to install your blind but at least starting with the minimum vertical space referenced above. The blind can be positioned higher up to give the appearance of a larger window and to have more clear space in the window when the blind is raised.
- Measure from the top of where you will mount the blind on the wall down to where you want the bottom of the blind to be, using the same extra space below your window opening as you used above, or to the bottom edge of the trim if you prefer; if you have a protruding windowsill, measure down to the top of the sill. That is your ordering height.
Width:
- Confirm that the height of your trim is at least the minimum height required for installing the mounting brackets. At the top of your window, use a steel measuring tape and measure from outer edge to outer edge of the trim. That is your ordering width.
Height:
- Measure from the top of your trim to the bottom of your trim or to the top of the windowsill if you have a protruding sill. That is your ordering height.
Width:
- Using a metal tape measure, measure left to right from the outside edge of the trim piece that goes around the glass to the other outside edge. That is your ordering width. However, if you have space, it is best to order the blind about 2" wider for better light control.
Height:
- Consider how far above the window trim piece you would like to install your blind but at least starting with the minimum vertical space referenced above. Measure down to where you want the bottom of the blind to be, using the same extra space below the window trim piece as you used above. That is your ordering height.
How to Install
How to Install: Inside Mount
2 min read
Let's make sure you have what you need!
What came with your blinds?
- Installation brackets
- Four mounting bracket screws (two per bracket)
- Center support bracket with support screws*
- One tilt wand
What else will you need in order to complete the installation?
- Rechargeable drill with ¼" hex bit
- Phillips screwdriver
- Pencil
- Tape measure
- Ladder
*If applicable to your order. Center support brackets will only be sent for blinds over 37" wide.
Download the PDF below for a complete step by step guide on how to install your inside mount blinds.
How to Install: Outside Mount
4 min read
Let's make sure you have what you need!
What came with your blinds?
- Installation brackets
- Four mounting bracket screws (two per bracket)
- Center support bracket with support screws*
- One tilt wand
What else will you need in order to complete the installation?
- Rechargeable drill with ¼" hex bit
- Phillips screwdriver
- Pencil
- Tape measure
- Ladder
*If applicable to your order. Center support brackets will only be sent for blinds over 37" wide.
Download the PDF below for a complete step by step guide on how to install your outside mount blinds.
Videos
Product Expert Review - Blindster 2" Cordless Vinyl Faux Wood Blind
Cordless Blinds and Shades
How to Measure for Inside Mount Blinds
How to Measure for Outside Mount Blinds
Reviews
4.8
Based on 255 reviews
Stephen
I was amazed at the quality, fit and beauty of the blinds! Honestly, for the price, I thought they would be cheap and look cheap, but definitely not the case. The bracket makes them easy to install with a flip up and back, snap into place effortlessly. We will be buying many more.
Bill
They were exactly as advertised. The company even contacted me before production to make sure that was the size ( its an odd size) i wanted and it wasn't a mistake
Judy
Loved the blinds and the price was right
Benny
Good blind fit real good I would buy again color was perfect
Pamela
Great product. Fast service.
Stephanie
Very nice appearance & great quality for an amazing price, especially for an unusual size blind that was difficult to find elsewhere. Easy installation. I love the ever so slightly beveled edge which ensures full closure for 100% privacy assurance. I will be replacing the rest of the blinds in my home with these. Thanks for a great product at a great price!
Edonnya
The are beautiful and very well made. Shipping took a little while, but once received, I was very pleased.
Cynthia
I intentionally went with one of the lower cost blinds since I didn't need anything spectacular for my bathroom window, so I wasn't sure what quality I'd get. It is great. And the customer service in reaching out to me to confirm I had ordered the correct size was much appreciated as well.
John
We replaced our old blinds in 3 rooms. They fit perfectly and look great. A definite upgrade.
Lita
These attractive blinds were easy to install, look great, and arrived quickly.