


LEVOLOR Light Filtering Solar Shades
SKU: LLFSSOSH
Made to order, ships in 5–7 business days. Once shipped, delivery typically takes 5 business days, depending on your location.
Protect your furnishings, reduce incoming glare and heat, and retain your view to the outside with stylish and functional LEVOLOR solar shades! Adorn your windows with shade styles that transcend boring and actually accentuate your home's decor.
- Go Cordless!
Color: Malibu - Honeywheat
34 colors available
$ - Essential
$$ - Classic
$$$ - Premier
Mount: Not selected
Size: 24" W × 36" H
Measurements to the nearest 1/8 inch.
Fit or Free Guarantee. If for any reason your window coverings don't fit, even if you make a mistake in measuring, we'll remake them in the size you need free of charge. More details about the Fit or Free Guarantee
Lift Type: Not selected
Roll Orientation: Not selected
Cassette Valance: Not selected
Installation Type: Not selected
Magnetic Door Brackets (Hold Downs): Not selected
Name your windowOptional
Installation help nearby
DIY Install is simple, but if you'd prefer help, enter your ZIP code to find available pros in your area.
- Fit or Free Guarantee
- Free Shipping
- 60-Day Satisfaction Guarantee
Product Information
Solar shades are a highly functional window covering, designed to help reduce heat gain and bright sunlight into the room, reduce glare, and protect furnishings from UV damage, all while letting you see through the shade to the outside. Yet some solar shades can seem too commercial or bland for residential use. That's where LEVOLOR solar shades break the mold with a unique color offering that matches the sophistication and style of your home's decor while still providing all the utility of a solar shade! Customize your new shade with a variety of lift options like the standard beaded chain lift (suitable for any window including tall ones), the smooth-as-silk cordless lift that has assisted raising and lowering for simple no-fuss control, or upgrade to maximum convenience with remote control motorized lift – raise one or all of your shades at once, or add the smart hub to connect to your home automation system. Top it all off with a cassette valance for a designer look and to help seal off any light seepage at the top of the window. Bring function and style to your windows with LEVOLOR solar shades!
Get to know this shade:
- Light filtering shade fabric reduces glare and heat gain while maintaining visibility to the outside during the day
- Wide assortment of classic and fashion-forward fabric styles and colors to fit any decor
- Sonoma, Key West, and Malibu styles are the same color front and back; Barcelona, Providence, Revival and Stonewash styles are white on the back (street facing side)
- Key West and Sonoma styles have 5% openness (95% UV blocking); all other styles are 3% openness (97% UV blocking)
Why you'll love this shade:
- Beautiful color options designed specifically for residential applications give you the same benefits of commercial solar shades in colors and styles that blend perfectly into your home decor
- Unique slim-fit design provides smaller side gaps vs other roller shades for improved window coverage and light control
- Choose ultra-smooth cordless lift, beaded chain operation, or convenient and effortless motorized operation
- Integrate motorized shades with smart home systems with the optional smart hub
- Optional cassette valance provides extra light control at the top of the shade while hiding operating mechanisms and brackets
- Premium quality from top to bottom, LEVOLOR is a leader in window treatment design
- Key West and Sonoma styles are GREENGUARD certified for better air quality with low chemical emissions
- Meets all CPSC requirements for child safety
Key considerations:
- The fabric width will be about 1 1/4" narrower (about 3/4" on each side) than the ordered width in order to accommodate the mounting brackets and control mechanisms at the top of the shade
- Solar shades do not provide nighttime privacy – consider pairing with another window treatment if you need to block the view from outside at night
- Shade components are color coordinated to the fabric in one of five colors: white, vanilla, gray, bronze or black.
Great for:Living RoomOfficeKitchenDining RoomEntry WayUtility Room
- Easy to Clean
- Privacy
- Child & Pet Safety
Made to order, ships in 5–7 business days. Once shipped, delivery typically takes 5 business days, depending on your location.
Key Features
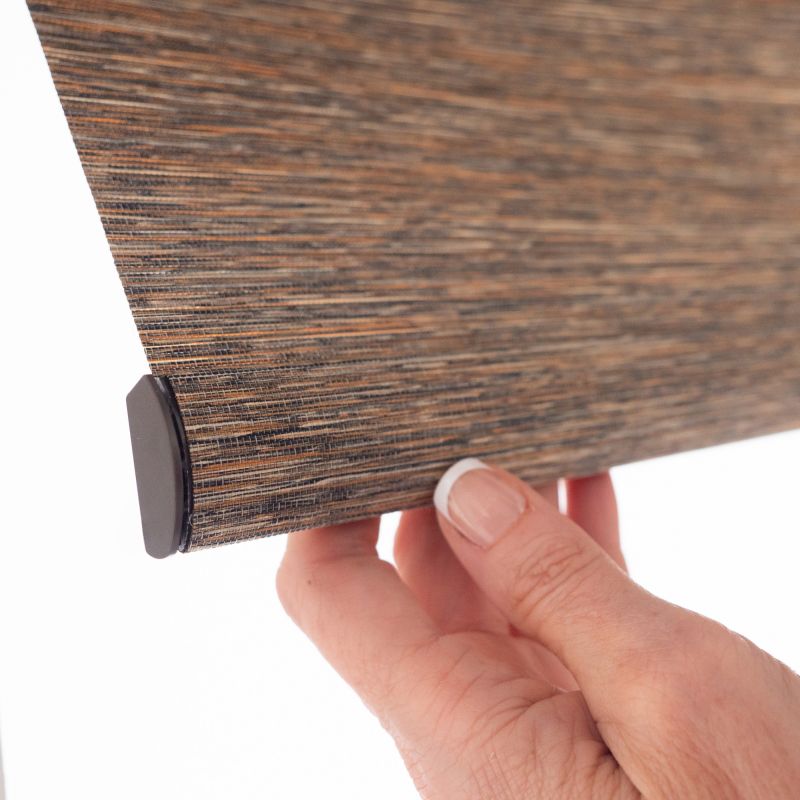
Omni Curved Wrapped bottom rail
The Omni Curved Wrapped bottom rail comes with coordinating color endcaps.
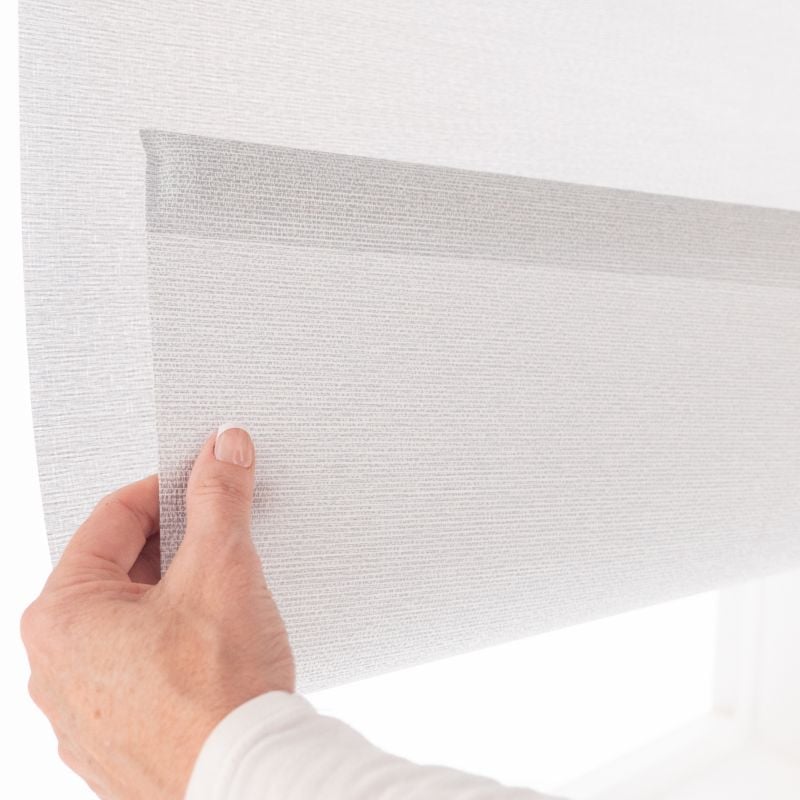
Shade Fabric
Shade material is the same color on front and back
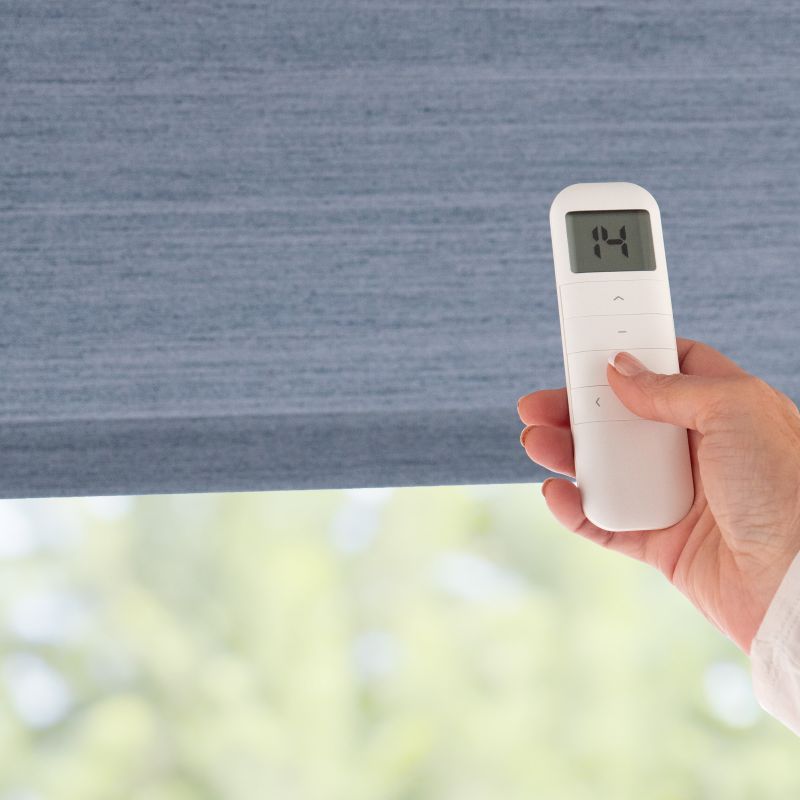
Motorized Lift Control
Upgrade to the ultimate in convenience with motorized lift control – operate multiple shades easily by remote control, even out-of-reach windows
Specifications & Restrictions
- Width
- 13" – 108"
- Height
- 12" – 108"
- Min depth for inside mount (without cassette)
1 3/8 inches
- Min depth for inside mount (with cassette)
1 ½ inches
- Min flat space for outside mount (without cassette)
1 5/8 inches
- Min flat space for outside mount (with cassette)
4 inches
- Depth Required for Flush Mount (no cassette)
2 1/8 - 4 inches (depending on roll diameter)
- Depth Required for Flush Mount (with Cassette & Standard Installation)
3 ¾ inches
- Cassette Valance Dimensions
3 1/8 inches (high) x 3 ¾ inches (deep)
- Minimum Depth Required for EasyMount Installation (with Cassette)
3 inches
- Inside Mount Width Deduction
Approximately 3/16 inch
- Fabric Width Deduction (continuous loop lift)
Approximately 1 5/16 inches for inside mount and 1 1/8 inches less for outside mount
- Fabric Width Deduction (cordless lift; no cassette)
1 7/16 inches when ordered as inside mount and 1 ¼ when ordered as outside mount
- Fabric Width Deduction (cordless lift; with cassette)
1 5/16 inches less when inside mount; 1 1/8 inches less when outside mount
- Fabric Width Deduction (Motorized lift; no cassette)
1 7/16 inches inside mount and 1 ¼ inches outside mount
- Fabric Width Deduction (Motorized lift; with cassette)
1 9/16 inches less when inside mount and 1 3/8 inches less when outside mount
- *Optional Extension Rod Length
30 inches
- CHARGER REQUIRED TO OPERATE MOTORIZED SHADES
At least 1 charger needs to be ordered
*Recharge time on a shade is 5 hours, chargers are not meant to be plugged into the shade long term.
Restrictions
- Shades ordered less than 32" in height will receive a METAL beaded chain.
How to Measure
How to Measure: Inside Mount
3 min read
INSIDE MOUNT:
Let's make sure an inside mount will work for your window! Using a metal tape measure, first check if you have sufficient depth:
- Measure inside the window opening from the back of the window to the front of the opening where the shade would mount. To mount the brackets, the depth at the top of the window must be at least 1 3/8" for shades without a cassette valance and 1 1/2" for shades with a cassette valance. To have a flush mount (meaning the shade is fully recessed in the window opening) the depth must be between 2 1/8" and 4" (depending on roll diameter) for shades without a cassette valance and 4 3/8" for shades with a cassette valance. If your depth is not sufficient for mounting the brackets, please see our outside mount instructions or consider a different product.
- A minimum of 3" of depth is needed at the top of the window opening if ordering the EasyMount headrail.
How to Measure:
Let's start with the Width:
- Measure inside of the window opening/frame from left to right at the top of the opening to the nearest 1/8". If rounding is necessary, round down to the nearest 1/8". That is your ordering width.
Now, let's do the Height:
- Measure the inside of the window opening/frame from the top of the opening to the bottom of the opening/sill to the nearest 1/8" in three places: on the left-hand side, the middle, and on the right-hand side. Write down all 3 measurements and circle the tallest. That is your ordering height.
Note: Always provide us with the actual measurement of the window opening. We will make the necessary deduction of approximately 3/16" to the width of the top of the shade to accommodate the installation brackets.
The fabric portion of the shade will be approximately 1 1/4" – 1 7/16" narrower than the ordered width (up to 3/4" gap on each side between the window opening and the edge of the fabric). When maximum light blocking is needed, consider an outside mount or an alternate product.
No deductions will be made to the ordered height.
How to Measure: Outside Mount
3 min read
Before you start measuring, decide where above your window opening you want to mount your shade. You will need at least 1 5/8" of flat vertical space above the window to mount the brackets for shades without a cassette valance, or at least 4" for shades with a cassette valance. Follow the directions below for where you'd like to install your shade.
If you do not have sufficient vertical space for mounting the brackets, please see our inside mount instructions or consider a different product.
Your ordered width will be the "tip to tip" measurement, which is the widest part of the top of the shade including the brackets and cassette valance (if applicable). The fabric portion of the shade will be approximately 1 1/4" – 1 7/16" narrower than the ordered width (up to 3/4" on each side). If you wish to have the fabric cover a specific width, we recommend ordering slightly wider – just ensure that you have enough horizontal space to mount the shade.
Width:
- Looking at your window and surrounding wall, decide what area you would like to cover. We recommend the shade extends about 2-3" on each side of the window opening for the best light control and appearance.
- Using a metal tape measure, measure from left to right including your desired extra space on each side of the window—that is your ordering width.
Height:
- Consider how far above the window you would like to install your shade but at least starting with the minimum vertical space referenced above. Since the shade spools onto the roll, it does not need to be installed high above the window to have the shade fabric fully clear the window.
- Measure from the top of where you will mount the shade on the wall down to where you want the bottom of the shade to be, using the same extra space below your window opening as you used above; if you have a protruding windowsill, measure down to the top of the sill. That is your ordering height.
Width:
- Looking at your window and surrounding wall, decide what area you would like to cover. We recommend the shade extends about 2-3" on either side of the window opening for the best light control and appearance.
- Using a metal tape measure, measure from left to right including any desired extra space on each side of the window—that is your ordering width.
Height:
- Consider how far above the window you would like to install your shade but at least starting with the minimum vertical space referenced above. Since the shade spools onto the roll, it does not need to be installed high above the window to have the shade fabric fully clear the window.
- Measure from the top of where you will mount the shade on the wall down to where you want the bottom of the shade to be, using the same extra space below your window opening as you used above, or to the bottom edge of the trim if you prefer; if you have a protruding windowsill, measure down to the top of the sill. That is your ordering height.
Note: The shade fabric may rub against the trim when operating. If your trim is more than 1/2" thick, consider adding shims (not included) under the brackets for additional clearance. If your trim is 3/4" or thicker, we recommend ordering the shade with the reverse roll option.
Width:
- We don't normally recommend mounting roller shades directly on the trim unless your window configuration doesn't allow for other placements. Your ordered width will be the bracket to bracket measurement which cannot exceed the width of your trim. However, the fabric portion of roller shades is always narrower than the ordered width, and will not extend to the edges of the trim.
- Confirm that the height of your trim is at least the minimum height required for installing the mounting brackets. At the top of your window, use a steel measuring tape and measure from outer edge to outer edge of the trim. That is your ordering width.
- Note that the fabric portion of the shade will be narrower than your ordered width.
Height:
- Measure from the top of your trim to the bottom of your trim or to the top of the windowsill if you have a protruding sill. That is your ordering height.
Width:
- Using a metal tape measure, measure left to right from the outside edge of the trim piece that goes around the glass to the other outside edge. That is your ordering width. However, if you have space, it is best to order the shade about 2-3" wider for better light control.
Height:
- Consider how far above the window trim piece you would like to install your shade but at least starting with the minimum vertical space referenced above. Measure down to where you want the bottom of the shade to be, using the same extra space below the window trim piece as you used above. That is your ordering height.
Note: We offer magnetic hold-downs for this product which can be requested during the ordering process. These should be installed for a successful door mount as they secure the shade at the bottom of the door so that it does not swing when the door opens and closes.
How to Install
How to Install: Inside Mount
2 min read
Let's make sure you have what you need!
What came with your blinds?
- Mounting brackets
- Screws
- Safety tension device*
- Extension Rod*
- Remote*
- Hub*
- No-Drill Headrail Mounting System*
What else will you need in order to complete the installation?
- Rechargeable drill (use ¼" drill bit)
- Phillips screwdriver
- Pencil
- Tape measure
- Ladder
*If applicable to your order.
IMPORTANT: Do not remove the paper wrapping around the shade's fabric until the shade is installed. Removing this paper prior to installation could result in the fabric shifting on the tube, or it might alter the stop location of the fabric.
Download the PDF below for a complete step by step guide on how to install your inside mount shades.
How to Install: Outside Mount
4 min read
Let's make sure you have what you need!
What came with your blinds?
- Mounting brackets
- Screws
- End Caps*
- Safety Tension Device*
- Extension Rod*
- Remote*
- Hub*
- Hold Down Catch Plates*
What else will you need in order to complete the installation?
- Rechargeable drill (use ¼" drill bit)
- Phillips screwdriver
- Pencil
- Tape measure
- Ladder
*If applicable to your order.
IMPORTANT: Do not remove the paper wrapping around the shade's fabric until the shade is installed. Removing this paper prior to installation could result in the fabric shifting on the tube or it might alter the stop location of the fabric.
Download the PDF below for a complete step by step guide on how to install your outside mount shades.
Videos
Blindster Solar Shades
LEVOLOR EasyMount
How to Measure for Inside and Outside Mount Roller and Solar Shades
How to Install Roller and Solar Shades
How They're Made - Roller Shades
Reviews
5.0
Based on 1 reviews
Karly
The solar shades turned out even better than I expected. The fabric selection was gorgeous, and they look so clean and modern.