


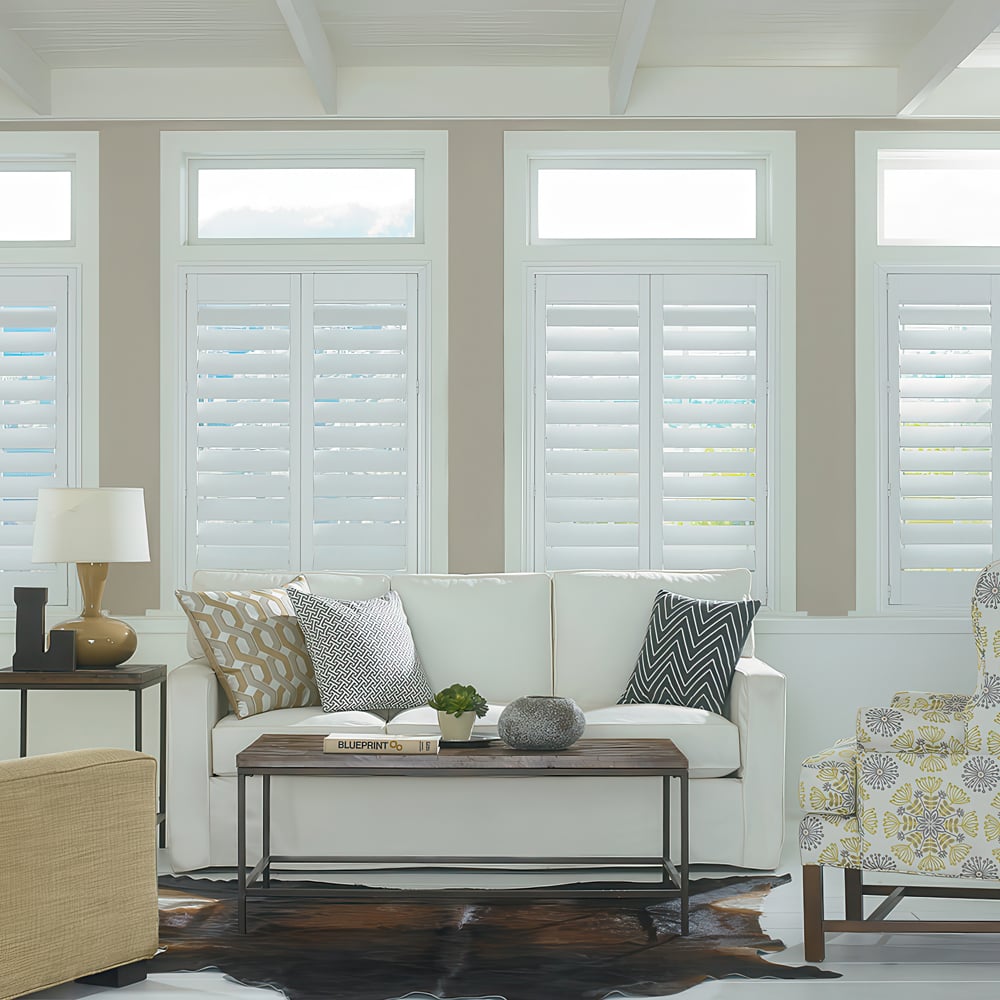

Deluxe Faux Wood Plantation Shutters
SKU: SSAVUSP
Made to order, ships in 7–9 business days. Once shipped, delivery typically takes 5 business days, depending on your location.
Enhance the look of your home with the timeless beauty of fine quality shutters. Considered the "ultimate window treatment", shutters not only provide timeless appeal but are also highly functional. Control your light and privacy in peak style with our Deluxe Faux Wood Shutters.
- 3" and 4" louver size
- Shutters under 48" wide will come fully assembled.
Color: White
2 colors available
$ - Essential
Size: 24" W × 36" H
Measurements to the nearest 1/8 inch.
Fit or Free Guarantee. If for any reason your window coverings don't fit, even if you make a mistake in measuring, we'll remake them in the size you need free of charge. More details about the Fit or Free Guarantee
Window Molding: Not selected
Protruding Window Sill: Not selected
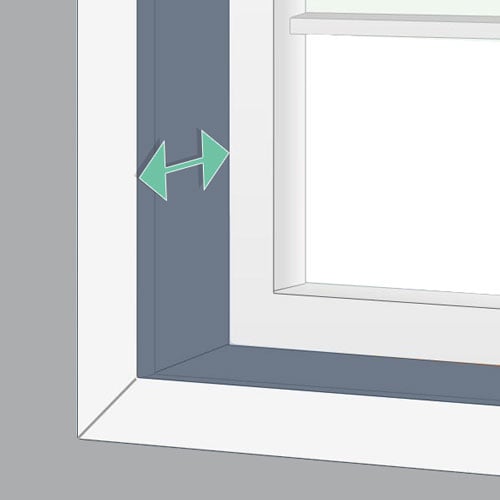
Window Opening Depth: Not selected
The measurement of the inside of your window frame. There are different depth requirements for each shutter mount/frame.
Mount Type and Frame Style: Not selected
Louver Size: Not selected
Panel Type: Not selected
Divider Rail: Not selected
Mount Location: Not selected
Tilt Bar Type: Not selected
Name your windowOptional
Installation help nearby
DIY Install is simple, but if you'd prefer help, enter your ZIP code to find available pros in your area.
- Fit or Free Guarantee
- Free Shipping
- 60-Day Satisfaction Guarantee
Product Information
Why simply cover your windows when you can truly treat them with elegance and performance of plantation shutters. Shutters provide an enduring look that never goes out of style, making them a perfect investment for your home's decor and curb appeal. But you don't need to spend a fortune to get this classic and value-adding look in your home. Our Deluxe Plantation Shutters are affordable while still giving you everything you want in a shutter. They are made from a high-performance polyresin material that insulates against temperature and sound, and are durable and low maintenance. The premium WoodTex finish provides the soft look of a painted wood shutter but with worry-free construction – no warping, chipping or flaking. Plus, with a hidden tilt mechanism included standard, you get a clearer view through the louvers with no external tilt rod. Enjoy extraordinary performance paired with extraordinary value with Blindster's Deluxe Faux Wood Plantation Shutters!
Get to know these shutters:
- Custom made to your exact window specifications
- Made from high performance polyresin with premium paint-like finish that doesn't flake or chip
- Hidden tilt mechanism is standard for easy operation and better view-through
- Modern look with your choice of 3" or 4" louvers, and several frame styles to fit your window and style
Why you'll love these shutters:
- Highly durable, low maintenance shutter material – easy to clean and long lasting
- Moisture resistant so they can be installed anywhere, including rooms like bathrooms, and in humid climates
- Excellent insulator against heat and cold for improved year-round energy efficiency
- Beautiful and affordable plantation shutters provide lasting value to your home
- Extremely fast production time – usually within 7 business days, with shipping straight to your home
How to order:
- Start configuring your shutters by entering the size of your window opening, per our measuring instructions below
- Answer a few questions about your window (whether you have existing trim or a protruding sill, and your window depth)
- Continue making selections – your choice for each step will update available selections for the next step
- We'll show you which options are compatible with your window – just pick the styles that work best for you!
Great for:Living RoomBedroomOfficeKitchenDining RoomMedia RoomBathroomEntry WayUtility Room
- Child & Pet Safety
- Insulating/Energy Efficient
- Easy to Clean
- Privacy
- Eco-Friendly
- Water Resistant
Made to order, ships in 7–9 business days. Once shipped, delivery typically takes 5 business days, depending on your location.
Specifications & Restrictions
- Width
- 12" – 72"
- Height
- 12" – 86"
- Min flat space For Outside Mount L-Frame
2 inches
- Min Depth For Inside Mount Z-Frame, 3" Louvers, Hidden Tilt
2 ¼ inches
- Min Depth For Inside Mount Z-Frame, 4" Louvers, Hidden Tilt
2 ½ inches
- Min Depth For Inside Mount L-Frame, 3" Louvers, Hidden Tilt
3 inches
- Min Depth For Inside Mount L-Frame, 4" Louvers, Hidden Tilt
3 ¼ inches
- Min Depth For Outside Mount L-Frame, 3" Louvers, Hidden Tilt
¾ inch
- Min Depth For Outside Mount L-Frame, 4" Louvers, Hidden Tilt
1 inch
- Inside Mount Width/Height Deduction
Approximately ¼ - 3/16" depending on frame style
Restrictions
- Divider rail required on all shutters over 62" high
- Shutters under 48" wide will come with the frame fully assembled.
How to Measure
How to Measure: Inside Mount
Please Note: Our shutters are designed for square and rectangular windows only. We do not offer shutters for arched, curved, or specialty size windows.
Let's make sure you have what you need!
- A metal tape measure
- Pen and paper to record all measurements
- Determine whether you will mount as an inside mount Z-Frame or an inside mount L-Frame based on the depth requirements and your window configuration.
- Z-Frame: Mounted inside the front edges of the window opening with a trim-cased window frame.
- Can be installed in windows with up to a ½" variance between your 3 width and 3 height measurements (see below).
- Have a protruding sill? This frame will have a flat bottom that rest on top of the sill for support.
- Depth requirements:
- 3" Louvers with a Hidden Tilt: 1 ¾"
- 4" Louvers with a Hidden Tilt: 2"
- L-Frame: Mounted inside the window opening, is fully recessed and flush with the wall.
- *Window frames that do not have equal measurements may create gaps between the shutter frame and the window opening. Caulk can be used to fill the gap.
- If the variance between your 3 width and/or height measurements is more than ½", we recommend an outside mount L-Frame.
- Depth requirements:
- 3" Louvers with a Hidden Tilt: 2 ½"
- 4" Louvers with a Hidden Tilt: 2 ¾"
- Z-Frame: Mounted inside the front edges of the window opening with a trim-cased window frame.
How to Measure:
Let's start with the Width:
- Inside of the window opening/frame measure from left to right at the top of the opening, the middle of the opening, and then the bottom of the opening. Write down all 3 measurements and circle the narrowest. If rounding is necessary, round down to the nearest 1/8”. That is your ordering width.
Now, let's do the Height:
- Inside of the window opening/frame measure from the top of the opening to the bottom of the opening/sill on the left-hand side, the middle, and on the right-hand side. Write down all 3 measurements and circle the smallest. If rounding is necessary, round down to the nearest 1/8". That is your ordering height.
Note: You are ordering the exact window opening size, not the size of the shutter to the nearest 1/8". The factory will make a deduction to your Width or Height to ensure your shutter will fit your opening.
- Z-Frame deduction: Approximately ¼" less
- L-Frame deduction: Approximately 3/16" less
How to Measure: Outside Mount
Please Note: Our shutters are designed for square and rectangular windows only. We do not offer shutters for arched, curved, or specialty size windows.
Let's make sure you have what you need!
- A metal tape measure
- Pen and paper to record all measurements
- Check if you have sufficient flat space and depth: This outside mount L-Frame requires 2" of flat space around the window. If you plan to mount this frame onto existing molding or trim, that space must also be at least 2" wide.
- L-Frame: Mounted outside the window opening onto an existing wall, door, molding, or trim.
- Depth requirements:
- 3" Louvers with a Hidden Tilt: ¾"
- 4" Louvers with a Hidden Tilt: 1"
- Depth requirements:
- L-Frame: Mounted outside the window opening onto an existing wall, door, molding, or trim.
How to Measure:
Let's start with the Width:
- If you are mounting the frames onto existing molding or trim, measure from the outside edges of the molding left to right at the top of the opening, the middle of the opening, and then the bottom of the opening. Write down all 3 measurements and circle the largest. If rounding is necessary, round down to the nearest 1/8”. That is your ordering width.
- If you are not mounting on existing molding or trim, measure from left to right at the top of the opening, the middle of the opening, and then the bottom of the opening. Write down all 3 measurements and circle the largest. Add 3"- 4" to the largest width measurement (the one you circled). That is your ordering width.
Now, let's do the Height:
- Follow the instructions for the configuration that applies to you:
- YES to molding/trim, YES to a protruding windowsill:
- Measure from the top of the sill to the outside edge of the trim above the window opening on the left-hand side, the middle, and on the right-hand side. Write down all 3 measurements and circle the tallest. That is your ordering height.
- NO to molding/trim, YES to a protruding windowsill:
- Measure from the top of the sill to the top of the window opening on the left-hand side, the middle, and on the right-hand side. Write down all 3 measurements and circle the tallest. Add 1 ½" - 2" to your tallest measurement (the one you circled). That is your ordering height.
- NO to molding/trim, NO to a protruding windowsill:
- Measure the height of the window opening on the left-hand side, the middle, and on the right-hand side. Write down all 3 measurements and circle the tallest. Add at least 3" to your tallest measurement (the one you circled). If rounding is necessary, round up to the nearest 1/8". That is your ordering height.
- YES to molding/trim, NO to a protruding windowsill:
- Measure the height of the window frame including trim, from outside edge to outside edge on the left-hand side, the middle, and on the right-hand side. Write down all 3 measurements and circle the tallest. If rounding is necessary, round up to the nearest 1/8". That is your ordering height.
- YES to molding/trim, YES to a protruding windowsill:
Note: The factory will make the exact sizes you specify, including the frames from outside edge to outside edge. They will not make any deductions to your Width or Height.
How to Install
How to Install Shutters
Let's make sure you have what you need!
What else will you need in order to complete the installation?
- Variable speed drill
- Slotted screwdriver
- Non marring hammer
- Level
- Pencil
- Tape measure
- Ladder
Can be purchased locally
- 3" Robertson bits #0, #1 and #2
- Caulk or sealant for both mitered corners and to cover gaps between the frames and window jambs
Download the PDF below for a complete step by step guide on how to install your new shutters.
Reviews
5.0
Based on 1 reviews
Dennis
Love these shutters! They look awesome, were super easy to put up, and totally upgraded the room.