
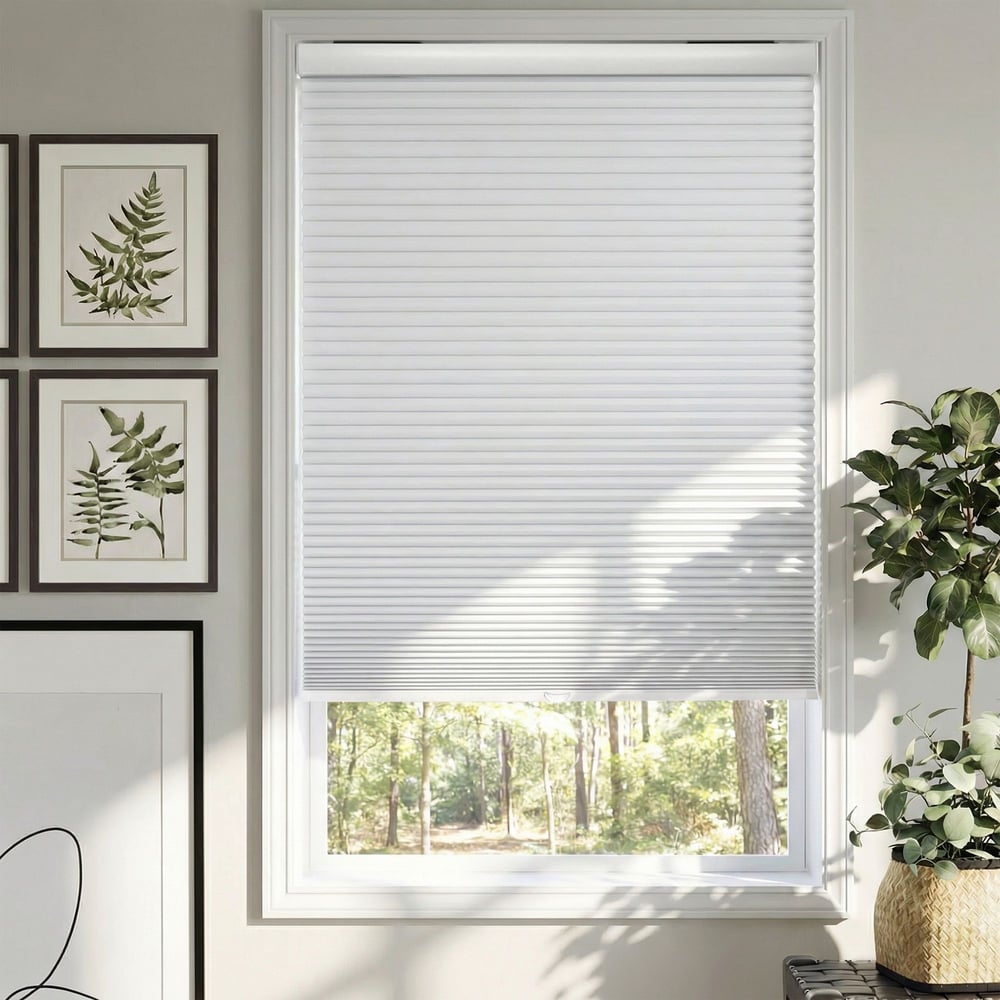
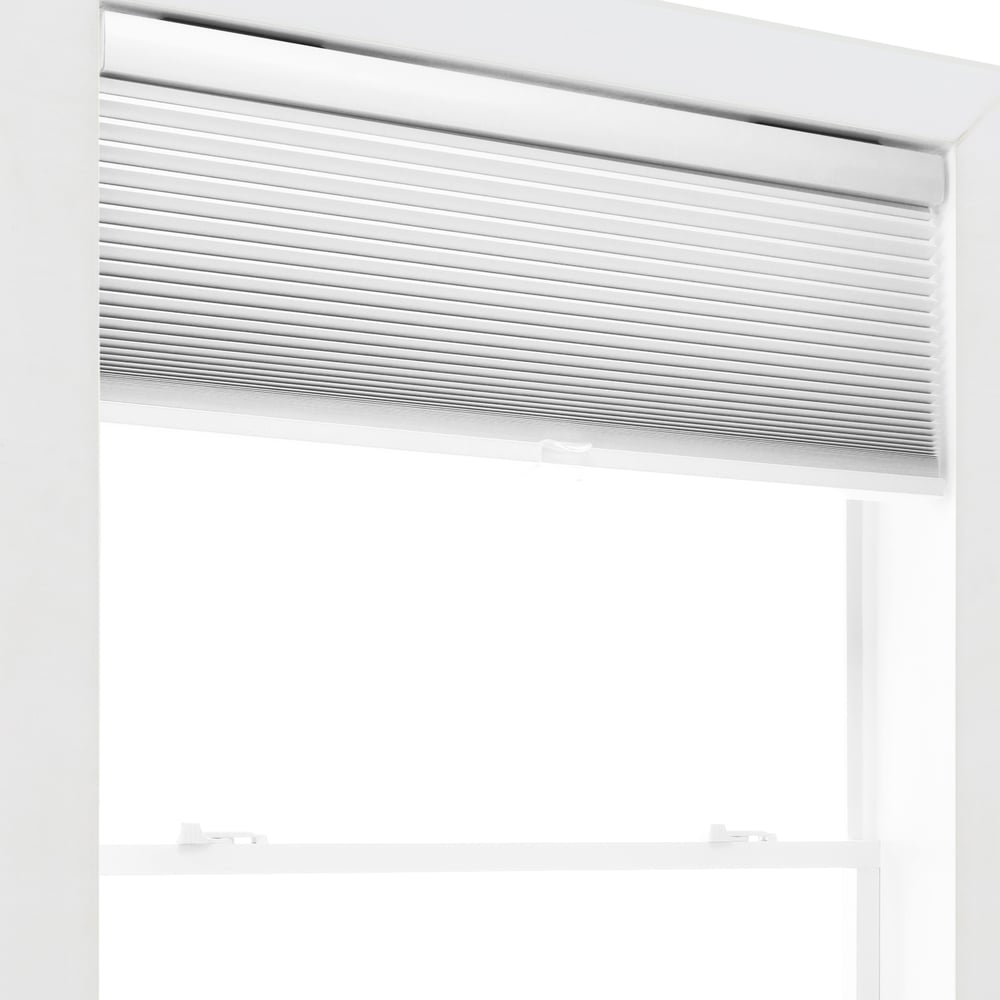


No Tools Cordless Blackout Single Cellular Shades
SKU: BLN-1DNTCBSCS
Made to order, ships in 1–3 business days. Once shipped, delivery typically takes 5 business days, depending on your location.
No tools were used in the installation of this shade. We’re not kidding! Our exclusive No Tools brackets peel and stick to your window frame with a super strong 3M adhesive. Between the quick installation, the light blocking fabric, and the kid-friendly cordless lift, this no drill shade is right at home in every room in the house.
- Install Without Any Tools
- No Lift Cords
- 5/8" Single Cells
Color: White
9 colors available
$ - Essential
Mount: Not selected
Size: 24" W × 36" H
Measurements to the nearest 1/8 inch.
Fit or Free Guarantee. If for any reason your window coverings don't fit, even if you make a mistake in measuring, we'll remake them in the size you need free of charge. More details about the Fit or Free Guarantee
Lift Type: Not selected
Name your windowOptional
Installation help nearby
DIY Install is simple, but if you'd prefer help, enter your ZIP code to find available pros in your area.
- Fit or Free Guarantee
- Free Shipping
- 60-Day Satisfaction Guarantee
Product Information
A cordless blackout shade that's also easy to install? Yes, please! Enjoy peaceful slumber with the light-blocking ability of this blackout no drill shade, perfect for bedrooms. You can also block harsh light for TV rooms and other windows that have bright, direct sunlight. The insulating design of cellular shades provides year-round energy savings by helping keep your home cool in summery and warm in winter. The cordless lift feature means you can move the shade just by pulling on the bottomrail to easily raise or lower to the desired height. And best of all, our No Tools brackets feature heavy-duty adhesive strips from 3M to securely install your new shades without any drilling or screws! Just peel and stick the brackets in place, then clip in the shade for the fastest and easiest installation available.
Get to know this shade:
- Blackout polyester fabric with Mylar lining prevents all light from passing through the shade
- Shade fabric features "honeycomb" air pockets with 5/8" pleats, providing superior insulation with a 5.0 R-value
- No drill brackets included for installation with strong adhesive strips instead of screws
- The back of the shade fabric is light gray for a neutral appearance to the outside, and headrail and bottom rail are color-coordinated to the fabric
Why you'll love this shade:
- No Tools Brackets provide secure, fast, and easy installation with no drilling or screws required
- Cordless lift provides easy operation with no dangling cords – safe for both children and pets
- Insulating shade material helps block the cold of winter and the heat of summer, helping reduce your heating and cooling bills
- Get your new shades fast with one-day production on most orders!
- Shades are certified as a Best for Kids™ child-safe product
Key considerations:
- Shades are produced in one business day after order is confirmed; allow 5-7 business days for shipping
- Blackout fabric prevents light passing through the shade; some light may still be visible in the gaps between the shade and the window
- You can also get this blackout shade with standard installation brackets and screws
Great for:Living RoomBedroomOfficeKitchenEntry WayUtility Room
- Privacy
- Child & Pet Safety
- Insulating/Energy Efficient
Made to order, ships in 1–3 business days. Once shipped, delivery typically takes 5 business days, depending on your location.
Specifications & Restrictions
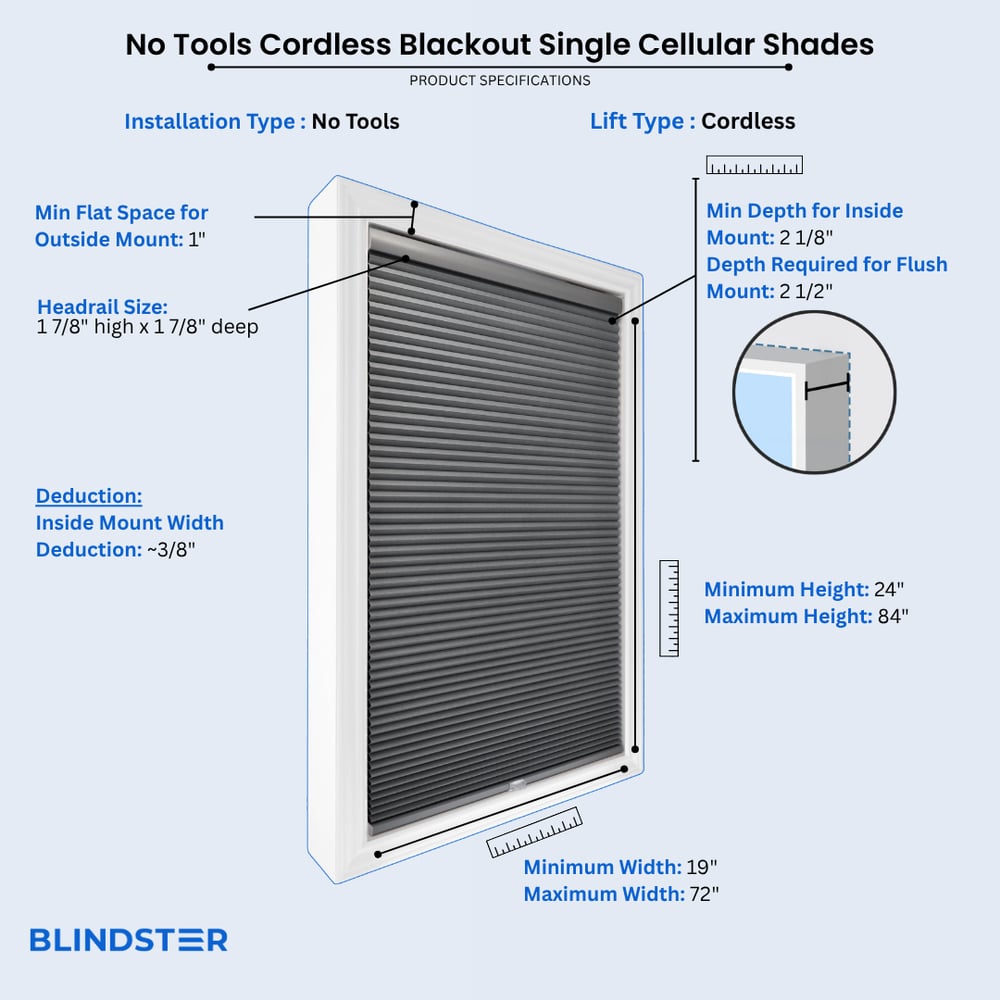
- Width
- 19" – 72"
- Height
- 24" – 84"
- Min depth for inside mount
2 1/8 inches
- Depth required for flush mount
2 ½ inches
- Headrail size
1 7/8 inches (high) x 1 7/8 inches (deep)
- Min Flat Space For Outside Mount
1 inch
- Inside Mount Width Deduction
Approximately 3/8 inch
Restrictions
- Cordless is the only available lift type
- 2 on 1 headrails are not an available option
- No tools brackets should be installed on a clean smooth surface, and are not recommended for freshly painted surfaces unless paint has cured for 30 days.
- Replacement brackets are available for a nominal charge
- Side Mount not available for Inside Mount, top mount only
How to Measure
How to Measure: Inside Mount
3 min read
Let's make sure an inside mount will work for your window! Using a metal tape measure, first check if you have sufficient depth:
- Measure inside the window opening from the back of the window to the front of the opening where the shade would mount. The depth at the top of the window must be at least 2 1/8" to mount the brackets. To have a flush mount (meaning the shade is fully recessed in the window opening) the depth must be at least 2 1/2". If your depth is not sufficient for mounting the brackets, please see our outside mount instructions or consider a different product.
How to Measure:
Let's start with the Width:
- Measure inside of the window opening/frame from left to right to the nearest 1/8" at three places: at the top of the opening, the middle of the opening, and then the bottom of the opening. Write down all 3 measurements and circle the narrowest. If rounding is necessary, round down to the nearest 1/8". That is your ordering width.
Now, let's do the Height:
- Measure the inside of the window opening/frame from the top of the opening to the bottom of the opening/sill to the nearest 1/8" in three places: on the left-hand side, the middle, and on the right-hand side. Write down all 3 measurements and circle the tallest. That is your ordering height.
Note: Always provide us with the actual measurement of the window opening. We will make the necessary deduction of approximately 3/8" to your shade's width to allow room for installation and for proper movement of the shade within the window opening. No deductions will be made to your height.
How to Measure: Outside Mount
4 min read
Before you start measuring, decide where above your window opening you want to mount your shade. You will need at least 1 1/2" of flat vertical space above the window to mount the brackets. The shade can be installed directly above the window opening, or higher up to give the appearance of a larger window and to have more clear space in the window when the shade is raised.
If you have trim around the window, you can mount the shade above the trim, directly on the trim (if you have the required minimum flat space for the brackets), or to the sides of the trim if you do not have enough mounting space above the window or on the trim itself. See the directions below for how you'd like to install your shade.
If you do not have sufficient vertical space for mounting the brackets, please see our inside mount instructions or consider a different product.
Width:
- Looking at your window and surrounding wall, decide what area you would like to cover. We recommend the shade extends about 2" on each side of the window opening for the best light control and appearance.
- Using a metal tape measure, measure from left to right including your desired extra space on each side of the window—that is your ordering width.
Height:
- Consider how far above the window you would like to install your shade but at least starting with the minimum vertical space referenced above. The shade can be positioned higher up to give the appearance of a larger window and to have more clear space in the window when the shade is raised.
- Measure from the top of where you will mount the shade on the wall down to where you want the bottom of the shade to be, using the same extra space below your window opening as you used above; if you have a protruding windowsill, measure down to the top of the sill. That is your ordering height.
Width:
- Looking at your window and surrounding wall, decide what area you would like to cover. We recommend the shade extends about 2" on either side of the window opening for the best light control and appearance. You can also choose to have the shade the same width as your window trim.
- Using a metal tape measure, measure from left to right including any desired extra space on each side of the window—that is your ordering width.
Height:
- Consider how far above the window you would like to install your shade but at least starting with the minimum vertical space referenced above. The shade can be positioned higher up to give the appearance of a larger window and to have more clear space in the window when the shade is raised.
- Measure from the top of where you will mount the shade on the wall down to where you want the bottom of the shade to be, using the same extra space below your window opening as you used above, or to the bottom edge of the trim if you prefer; if you have a protruding windowsill, measure down to the top of the sill. That is your ordering height.
Width:
- Confirm that the height of your trim is at least the minimum height required for installing the mounting brackets. At the top of your window, use a steel measuring tape and measure from outer edge to outer edge of the trim. That is your ordering width.
Height:
- Measure from the top of your trim to the bottom of your trim or to the top of the windowsill if you have a protruding sill. That is your ordering height.
Width:
- Using a metal tape measure, measure left to right from the outside edge of the trim piece that goes around the glass to the other outside edge. That is your ordering width. However, if you have space, it is best to order the shade about 2" wider for better light control.
Height:
- Consider how far above the window trim piece you would like to install your shade but at least starting with the minimum vertical space referenced above. Measure down to where you want the bottom of the shade to be, using the same extra space below the window trim piece as you used above. That is your ordering height.
Note: We carry complimentary hold-downs (door brackets) which can be requested during the ordering process. These should be installed for a successful door mount as they secure the shade at the bottom of the door so that it does not swing when the door opens and closes.
How to Install
How to Install: Inside Mount
2 min read
Let's make sure you have what you need!
What came with your blinds?
- No Tools mounting brackets
- Alcohol pads
- Handle for bottom rail
What else will you need in order to complete the installation?
- Pencil
- Tape measure
- Ladder
Download the PDF below for a complete step by step guide on how to install your inside mount blinds.
How to Install: Outside Mount
4 min read
Let's make sure you have what you need!
What came with your blinds?
- No Tools mounting brackets
- Alcohol pads
- Handle for bottom rail
- Hold down brackets with adhesive pads*
What else will you need in order to complete the installation?
- Pencil
- Tape measure
- Ladder
*If applicable to your order.
Download the PDF below for a complete step by step guide on how to install your outside mount blinds.
Read More About This Product
Better Than Room Darkening Curtains
If you’ve tried room darkening curtains, you know they often leave gaps where light slips through the sides. With these No Tools Cordless Blackout Single Cellular Shades, you get a true blackout experience right inside the window frame. Unlike curtains, cellular shades create a cleaner look and a better fit.
Light Filtering and Blackout Flexibility
While these coverings are designed for total darkness, they can also be adjusted to create a light-filtering effect when partially lowered. This makes them a versatile option for living areas or bedrooms where you sometimes want natural daylight without glare.
Unlike roller shades, which can appear flat, the structured pleats of these cordless coverings provide a refined texture and a modern finish. In popular colors like white or black, they can blend seamlessly with your décor while still allowing you to control the brightness.
Perfect for Dorms and Rentals
The peel-and-stick design makes these a great choice for a dorm room or rental property where drilling into the wall isn’t allowed. With no tools required, students can enjoy privacy, comfort, and energy savings without losing their security deposit. And because they’re cordless, these coverings also meet modern safety standards for child and pet safety.
Blindster’s cellular shades are lightweight, easy to adjust, and available in neutral colors such as white and gray, so they’ll match any shared space. The crisp pleats also keep the fabric looking neat even after frequent use, which is important in small areas where design matters.
Designed for Tight Spaces
Need coverage for a non-standard window? These cordless shades can be ordered to the exact size you need for a perfect fit. Whether you want blackout comfort for a bedroom or glare reduction for a study, their slim profile and durable fabric make them an excellent choice where standard curtains or blinds won’t work.
Choose from finishes like black for a bold contrast or white for a clean, minimal look. The cordless lift system makes operation simple, even for tall doors, and the insulating structure of these cellular shades helps regulate temperature year-round.
Design and Color Choices
These coverings aren’t just functional; they bring a polished look to the areas where they're implemented. Choose from white, gray, or black for modern simplicity, or select a brown tone for warmth and a natural appearance. Custom size ordering ensures the design matches your décor. It’s easy to see why customers consider them a stylish item that works in almost any room.
The evenly spaced pleats add dimension and style while preventing the fabric from sagging. Pair that with a cordless lift system, and you’ve got a covering that’s both stylish and practical.
Quality That Stands Out
Crafted with premium polyester and lined with Mylar, these coverings deliver the results you expect from a trusted brand. They offer reliable insulation against heat and cold, while the durable fabric resists fading and sagging. Whether used in a kitchen, bedroom, or living area, they remain one of the best long-term values at an affordable cost.
Available in white, black, gray, and brown, these cellular shades not only perform well but also add a touch of beauty. Many customers appreciate that the cordless operation provides simplicity and safety without sacrificing elegance.
Helpful Buying Tips
Before you enter your order details, double-check your measurements to ensure a seamless fit. Blindster frequently works with top sellers to offer competitive pricing, so you can get the performance you need without overspending. The majority of buyers find that ordering slightly longer lengths provides better coverage and a cleaner finish, especially over doors and tall openings.
Blindster provides competitive price options. Whether you’re buying a single item or outfitting your entire office, you’ll enjoy the combination of beauty, durability, and ease that these cellular shades bring.
Videos
Product Expert Review - Blindster No Tools Cordless Blackout Single Cellular Shades
No Tools Blinds and Shades - Fast and Easy
How to Measure for Inside Mount
How to Measure for Outside Mount
Cordless Blinds and Shades
How to Install No Tools Blinds and Shades
How They're Made - Cellular Shades
Reviews
4.8
Based on 510 reviews
Lloyd
They go above and beyond to make sure their customers are satisfied with their service and we are. Thank you
Jim
After hanging numbers of cellular shades over the years, I was delighted to see a no tools option when I purchased two blackout shades for our guest house. The shades are the same high quality we are used to, perfect color and no drills or holes in the window frame. Highly recommend!
Kelly
I purchased for a metal door in a rental -- meaning we didn't want to our holes in the door. Perfect solution.
Sarah
As described. Seems quality
Ruth a
Blind was as expected.
Bernadette
I only recently heard about no tools shades and was skeptical that they would work. The installation was very straightforward and I have been extremely satisfied with the product. I live in an urban environment and the quality of my sleep has improved since installing these blinds.
Donald
The blind fit the window perfectly. It works as described. We will be replacing others.
Asher
I ordered the no effort install blinds for my son's apartment. So easy to install and fit perfect. First try.
Angela
Blinds fit perfectly and the installation was a breeze. Definitely recommend!
Amy
Pretty easy to install and looks great.